
Uncategorized Archives - Page 2 of 3 - Hernandez Video Hernandez Video

Uncategorized Archives - Page 2 of 3 - Hernandez Video Hernandez Video

video film company

transfer vhs to dvd

transfer dvd to digital

corporate video

How to Scan Old Photos to Digital Safely

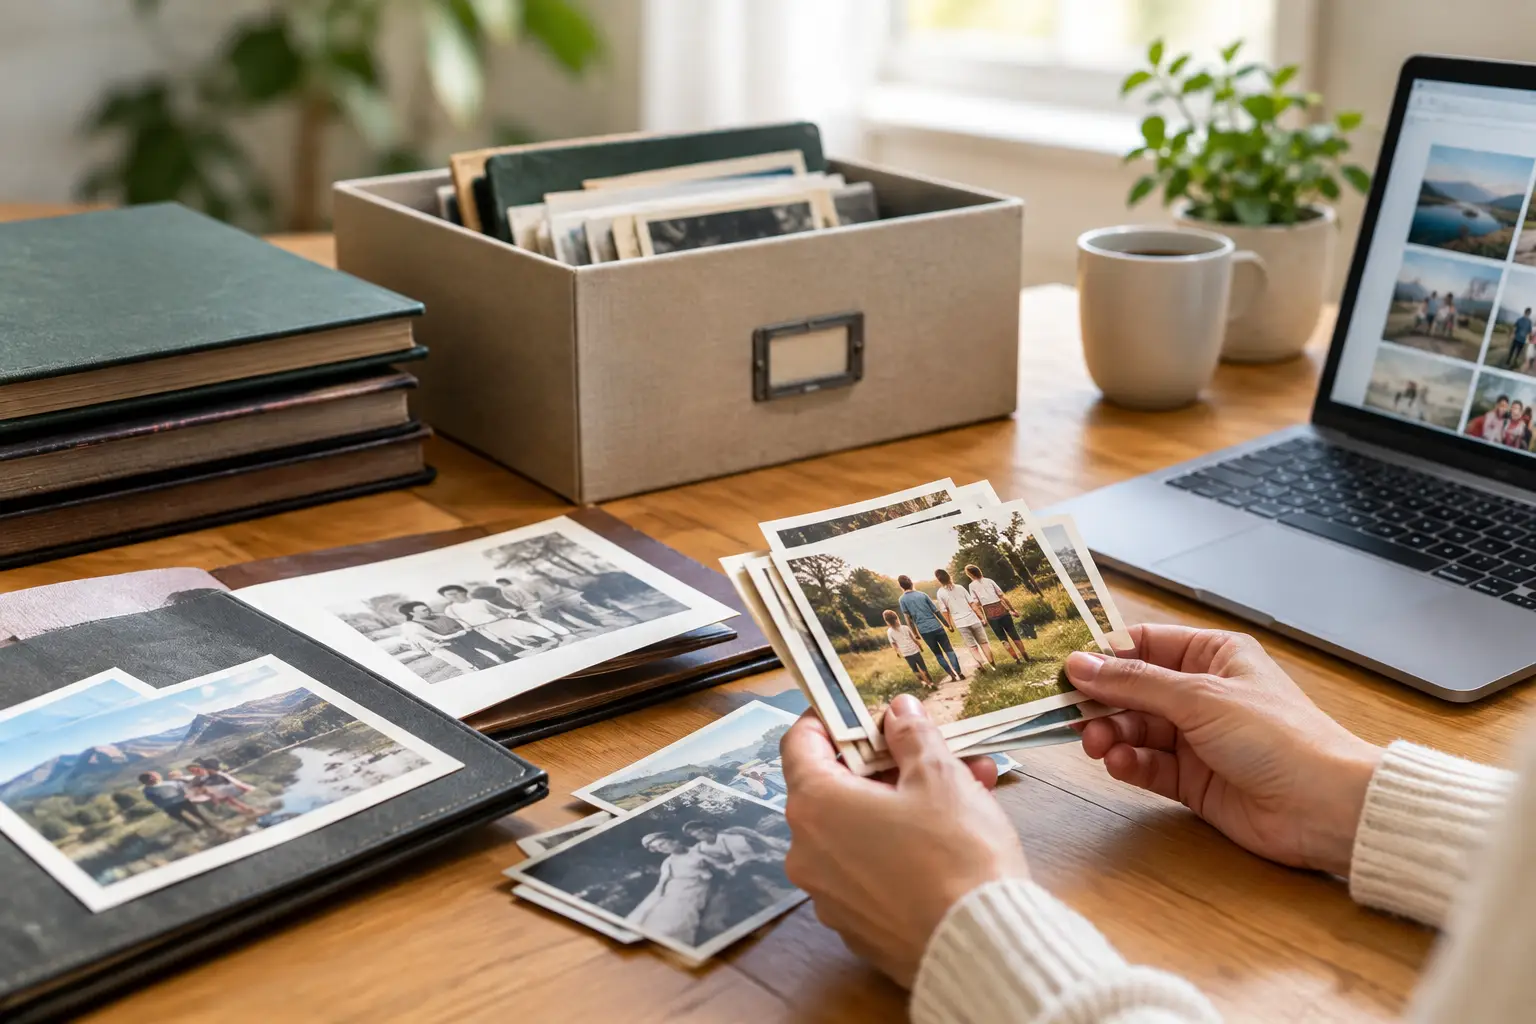
That box of loose prints may hold the only image of a grandparent as a young parent, a child’s first day of school, or a family home that no longer stands. Paper photographs can fade, scratch, stick together, and suffer damage from heat, moisture, and careless storage. When you scan old photos to digital, you create a usable copy of those moments before more detail is lost.

The goal is not simply to turn a photograph into a computer file. It is to preserve the best possible version of the original, organize it so your family can find it, and keep more than one copy in a safe place. A little care at the beginning can make a tremendous difference years from now.

Start by Sorting, Not Scanning

It is tempting to feed every picture into a scanner as quickly as possible. Before you do, take a little time to group your collection. Separate prints by family branch, decade, event, or person if you can identify them. Put photos that need special attention – torn prints, curled pictures, albums, framed photos, slides, and negatives – in their own groups.

Sorting gives you a chance to remove duplicates and decide what deserves the highest-quality scan. You may not need a large archival scan of every drugstore reprint from the 1990s. On the other hand, an original wedding portrait, a military photograph, or the only image from a family reunion deserves careful preservation.

As you work, write down names, dates, locations, and stories while they are still known. Even a simple note such as “Grandma Elena and her sisters, Tampa, about 1952” can become priceless context. Digital images are far more meaningful when they are not anonymous faces in a folder.

Clean Photos With a Light Touch

Old prints are more fragile than they look. Avoid using household cleaners, water, tape, or aggressive rubbing. Those methods can smear inks, lift the photo surface, or leave permanent marks.

Use clean, dry hands or nitrile gloves when handling valuable prints, especially glossy photos. A soft air blower or a very soft, clean brush can remove loose dust. Do not press hard on creases, scratches, or stains. Scanning will preserve what is there, but trying to force a damaged photo flat may cause more harm than good.

If photographs are stuck together, moldy, water-damaged, or mounted in an old album, stop before pulling them apart. These are situations where professional handling is usually the safer choice. The same applies to very old tintypes, cabinet cards, Polaroids, and photos with flaking or cracking surfaces.

Choose Resolution Based on the Original

Resolution determines how much image detail your digital file captures. It is measured in dots per inch, or dpi. Higher resolution creates a larger file and may capture more detail, but it does not repair a blurry or faded original. The right setting depends on the size of the photograph and what you hope to do with it.

For most standard 4-by-6-inch or 5-by-7-inch prints, 600 dpi is an excellent preservation choice. It provides enough detail for viewing, sharing, and making reasonably sized reprints. If you only need simple digital copies for email or a family slideshow, 300 dpi can be adequate, though it leaves less room for future enlargement.

Small photos need more attention. Wallet-size prints, tiny snapshots, and images you may want to crop or enlarge are often best scanned at 1,200 dpi. Large prints usually do not need such a high setting because the original already contains more physical image area.

Avoid assuming that the highest number on a home scanner is always better. Extremely high settings can create huge files, slow the process, and capture paper texture or grain without adding meaningful image information. A thoughtful setting is more useful than a maximum setting.

Save a Master File and a Sharing Copy

A good preservation plan usually includes two versions of an image. The master file is your high-quality archive. Save it as a TIFF when possible because TIFF files preserve image data without the compression used by many common photo formats. Keep the master untouched after scanning.

For everyday use, create a JPEG copy. JPEGs are easy to text, email, upload, and view on nearly every phone, tablet, and computer. They are smaller and more convenient, but each time a JPEG is heavily edited and re-saved, it can lose a little quality. That is why the original TIFF master matters.

Name files consistently so they make sense outside the scanning project. A format like `1952_Elena_Hernandez_Tampa_FamilyPortrait` is much more useful than `IMG_0047`. If a date is uncertain, use an estimate such as `circa_1952`. Clear names make it easier for children, grandchildren, and estate organizers to understand the archive later.

Use Careful Color Correction

Many old photos have a yellow, red, or blue cast from aging. A scanner or editing program may offer automatic color restoration, and it can be helpful. Still, automatic correction should be used with care. It may improve a faded outdoor snapshot while making a natural vintage portrait look unnaturally modern.

Preserve a clean, unedited scan first. Then make an adjusted copy for sharing or printing. This lets you brighten a dark face, reduce a color cast, or correct a tilted image without losing the original digital record.

Retouching also has limits. Software can reduce dust spots and minor scratches, but it cannot reliably recreate details that have disappeared. Heavy repair work can sometimes alter facial features, clothing, or background details. For a cherished photograph, a light touch is usually more honest and more beautiful.

Photograph Albums and Oversized Prints Differently

Not every image should be placed on a flatbed scanner. Photos mounted in an album can crack at the binding or tear when removed. Oversized portraits may not fit the scanner bed. Framed photos may be difficult to scan without risking glass, backing, or the image itself.

A carefully lit camera setup can be a better approach for these items. The photo should be supported flat, photographed straight on, and lit evenly from both sides to avoid glare. This method takes practice, especially with glossy prints, but it can preserve an album page or large image without dismantling it.

For families with several albums, hundreds of loose prints, or a mix of photos, slides, negatives, VHS tapes, and film reels, professional digitization can save considerable time and reduce risk. Hernandez Video handles irreplaceable media with the care and technical attention these family treasures deserve, creating digital files that are easy to enjoy on modern devices.

Back Up the Files in More Than One Place

A scanned photo is only protected if the digital copy is protected, too. Computers fail, phones are lost, and external drives can eventually stop working. Keep your archive in at least three places: your primary computer, an external hard drive, and a secure cloud storage account or a second drive stored away from home.

Check your files once or twice a year. Open a sample of folders, make sure the drive still works, and confirm that important photos are not only sitting in one location. It is also wise to share copies with a trusted relative. Family history is safer when it is not held by one person alone.

When Professional Scanning Is Worth It

Home scanning works well for a modest number of standard prints in good condition. Professional help is often worthwhile when time is limited, the collection is large, or the material is delicate. It is particularly valuable for slides, negatives, damaged photos, albums that cannot be safely taken apart, and images that need high-resolution results for printing.

The best choice depends on the condition of your collection and how you want to use it. What matters most is beginning before fading, physical damage, or an unexpected loss makes preservation harder. Set aside one small box this week, identify the stories inside it, and give those memories a safe digital future.

Reel to Reel Audio Transfer for Family Archives

A voice on an old tape can bring someone back into the room. It may be a grandfather telling a story, a child singing into a home recorder, a church performance, a band rehearsal, or a message saved decades ago. Reel to reel audio transfer gives those recordings a future before aging tape, failing equipment, and time make them harder to hear.

For many families, these reels sit in closets, storage boxes, or estate collections because no one has a machine that will play them. That does not mean the recordings are lost. With careful inspection, the correct playback equipment, and professional digitization, reel-to-reel recordings can be preserved as digital audio files that are far easier to enjoy, organize, and share.

Why Reel-to-Reel Tape Needs Attention Now

Reel-to-reel tape was widely used for home recordings, radio work, music, oral histories, and live events. It often delivered better sound than smaller consumer formats, which is why so many meaningful recordings were made on it. But magnetic tape was never meant to last forever.

Heat, humidity, dust, smoke, poor storage, and repeated playback can all affect the recording. The tape may become brittle, stretched, curled, or shed oxide, the magnetic coating that holds the sound. Some tapes develop a sticky condition that causes them to squeal, drag, or stop during playback. A reel may look fine at first glance while still needing expert handling before it goes near a machine.

The other challenge is access. Reel-to-reel decks vary by tape width, reel size, recording direction, speed, track layout, and equalization standard. Playing a tape on the wrong setup can produce distorted pitch, missing audio, weak sound, or an incorrect stereo image. In the worst cases, forcing a damaged tape through a machine can cause more harm.

That is why preservation is best approached as more than simply pressing record while a reel plays. The goal is to capture what is truly on the tape as safely and accurately as possible.

What Happens During Reel to Reel Audio Transfer

A careful reel to reel audio transfer begins with evaluating the physical media. The reel, tape pack, leader, splice points, and hub are checked for signs of damage or instability. If a tape needs repair, that should be addressed before playback. Old adhesive splices can fail, leaders can detach, and loose or unevenly wound tape may need attention.

Next comes identifying the recording format. A tape recorded at 3 3/4 inches per second will sound wrong if played at 7 1/2 inches per second. Likewise, a quarter-track consumer recording and a half-track recording require different playback alignment. Small technical details matter because they determine whether the digital copy sounds natural and complete.

The tape is then played on properly maintained equipment and captured in real time to a high-quality digital format. Real time is a key part of the process. An hour-long reel takes about an hour to transfer, not counting inspection, setup, repair, or file preparation. Fast service should never mean rushing an irreplaceable recording through an unknown machine.

Once captured, the recording can be reviewed for major issues such as dropouts, hum, low volume, channel imbalance, or sections that require special attention. Gentle cleanup may improve listenability, but restoration should be handled with restraint. Heavy noise reduction can remove hiss, yet it can also dull voices, soften music, or create an unnatural sound. For family recordings, preserving the character of the original often matters more than making it sound artificially new.

The Digital File Matters as Much as the Transfer

A digital copy is only helpful if you can use it. Many customers prefer a convenient audio file for phones, computers, and easy sharing with relatives. Others want a high-resolution archival master in addition to a listening copy. Keeping both is often the best choice when the content is especially important.

An archival master preserves more of the original recording information and gives you a better source if restoration is desired later. A smaller listening file is practical for emailing, playing in the car, or adding to a family slideshow. The right delivery format depends on how you plan to enjoy the recordings, so it is worth discussing before the transfer begins.

Organization also makes a lasting difference. If several reels are part of a collection, clear names can help identify the person, date, occasion, and reel number. A file named “Grandma Interview 1982 – Reel 1” is far more useful to a future family member than a string of random numbers. If there are labels, boxes, notes, or track sheets with the tapes, keep them with the order. They may hold valuable clues about the recording.

Preparing Your Reels for Transfer

You do not need to clean, repair, or test-play old reels at home before bringing them in. In fact, an uncertain home test can be risky if the tape is fragile or the machine is not in good working condition. The safest first step is to keep the reels dry, stable, and protected from direct heat while you arrange professional evaluation.

Bring along any information you have, even if it seems incomplete. Notes such as “Dad’s Navy recordings,” “choir concert,” “radio show,” or “1959 Christmas” can help identify the material. If you have multiple reels, placing a small note with each one helps prevent mix-ups.

Avoid using household tape to repair a broken section. Do not try to rewind a reel that is stuck, and do not throw away a reel because it has mold, a broken leader, or an unfamiliar label. A damaged tape may still be recoverable, and an odd-looking reel may contain a recording no one else has heard in years.

Common Reel-to-Reel Questions Families Ask

Can every reel be transferred?

Many reels can be transferred, but results depend on the tape’s condition, its recording format, and whether the audio is still present. Some tapes are blank, recorded over, or severely deteriorated. A trustworthy service should be honest about the condition and explain the available options rather than promise a perfect result before inspecting the reel.

Will the transfer remove all hiss and noise?

Not always, and that is not necessarily a bad thing. Tape hiss, room noise, and the limitations of the original recorder are part of older recordings. Light restoration can be helpful, especially when speech is difficult to understand, but aggressive processing can change the voice or music you want to preserve. The best approach depends on whether the recording is a family conversation, a music performance, or an archival interview.

Should I keep the original reels after transfer?

Yes. The digital files make the audio accessible, but the original reel remains the source recording. Store it in a cool, dry indoor space, away from garages, attics, sheds, and damp basements. Keep it in its box when possible, and avoid placing heavy items on top of it.

What if I do not know what is on the tape?

That is very common. Estate collections and family storage often contain unlabeled reels. An evaluation can help determine whether there is recorded material and what format is needed to play it. Sometimes an unlabeled tape reveals a voice, song, or event that the family thought was gone.

A Personal Record Deserves Careful Handling

Audio preserves details that photographs cannot: the pause before a laugh, the cadence of a familiar phrase, applause after a performance, or the sound of a loved one calling your name. Those details can become more meaningful as years pass.

At Hernandez Video, reels are treated as personal history, not as ordinary objects to be processed in bulk. With more than 35 years of audiovisual experience, careful format identification and thoughtful handling help families preserve recordings that may exist nowhere else. SE HABLA ESPAÑOL.

If you have reels waiting in a box, you do not have to know the tape speed, track format, or technical condition to take the next step. You only need to recognize that the voices and moments on them are worth saving while they can still be heard.

Audio Cassette to Digital Service for Family Voices

A familiar voice on a cassette can stop a family in its tracks: a grandparent telling a story, a child’s first piano recital, a wedding toast, a church sermon, or a message recorded years ago for someone who is no longer here. An audio cassette to digital service gives those recordings a future before the tape, the cassette shell, or the last working player lets you down.

Many people put off transferring cassettes because the tapes appear fine in a drawer. Unfortunately, cassette tapes can deteriorate quietly. The magnetic coating can weaken, tape can stretch or break, and old players can chew or damage a recording that may be impossible to replace. Digital preservation is not only about convenience. It is a careful way to safeguard voices, music, and moments that belong to your family history.

Why cassette recordings need attention now

Compact cassettes were made for everyday listening, not for decades of storage. Even tapes kept indoors can be affected by heat, humidity, dust, and the normal aging of their materials. A tape may still play, but it can develop hiss, uneven speed, muffled sound, dropouts, or moments where the audio fades in and out.

The cassette deck matters just as much as the tape. Belts harden, motors drift, pinch rollers wear down, and playback heads become dirty or misaligned. A low-quality player can make a good tape sound poor. Worse, a malfunctioning machine can snag the tape and create a repair problem where there was none before.

There is also the access problem. A cassette that survives physically is still difficult to enjoy if no one in the family owns a reliable cassette player. A digital file can be played on a computer, phone, tablet, television, or shared with relatives who live across the country. The original remains part of the archive, while the recording becomes useful again.

What an audio cassette to digital service should do

A professional audio cassette to digital service begins with careful handling, not a one-size-fits-all process. Each tape should be inspected before transfer, especially when it is old, visibly damaged, tightly wound, or has been stored in a garage, attic, or humid space.

The goal is to capture the best available playback from the original recording. That means using properly maintained equipment, monitoring the audio as it is transferred, and watching for issues such as distorted sound, unstable speed, or tape damage. Some recordings need basic cleanup after capture, while others should remain largely untouched so the character of the original is preserved.

Cleaning up sound involves judgment. Reducing distracting hiss or hum can make voices easier to understand, but excessive processing may make speech sound unnatural or remove details from music. For a family interview, clarity may be the priority. For a cassette made by a local band, a recital, or a treasured radio recording, preserving the original tone may matter more. The right approach depends on the tape and why it matters to you.

A dependable service should also explain what you will receive. Most families benefit from standard digital audio files that are easy to play and share. If you are building a long-term archive, ask whether a higher-quality preservation file can also be provided. Having both can be practical: one file for everyday listening and one master file for safekeeping.

The recordings families are most grateful to save

Cassette collections are often more meaningful than they look. They may be labeled only with a first name, a month, or a handwritten note that has faded over time. Once transferred, those little mysteries can become some of the most valuable recordings in the home.

Common cassette projects include recorded letters from deployed service members, oral-history interviews, memorial recordings, family gatherings, children singing or telling stories, language lessons, sermons, dictated memoirs, and old answering-machine messages. Musicians may also have rehearsal tapes, original songwriting demos, or recordings of performances that were never copied anywhere else.

Do not assume a blank-looking tape has no value. Families often reused cassettes, recorded over only part of a side, or saved a tape with no label at all. It is worth checking carefully before discarding anything. An experienced transfer specialist can help identify what is playable and flag tapes that need special attention.

Preparing your cassette collection for transfer

You do not need to clean or repair tapes yourself before bringing them in. In fact, trying to force open a stuck cassette or reattach broken tape without the right tools can cause more damage. Keep each cassette in its case if you have it, and place loose tapes in a clean, dry box for transport.

If you know the contents, write down what is on each tape. A simple note such as “Mom’s interview, 1994,” “Dad’s band,” or “Christmas messages” can make the finished digital collection much easier to organize. Include dates, names, and side A or side B information when possible. These details may seem small now, but they become invaluable when family members revisit the recordings years from now.

Avoid storing cassettes in a hot car, near speakers, or beside strong magnets. Keep them away from moisture and direct sunlight. If a tape has mold, smells musty, is visibly wrinkled, or has snapped tape hanging from the shell, separate it from the rest of the collection and let a professional examine it.

Repair and difficult tapes: when expertise matters

Some cassette problems are repairable. A broken leader, cracked shell, jammed reel, or damaged pressure pad may be addressed so the recording can be played safely. However, repair is not a promise that every second of audio will sound perfect. If the magnetic layer has deteriorated or a section was damaged long ago, there may be permanent loss.

That is why a careful transfer is worth more than simply connecting an old cassette deck to a computer. The work involves evaluating the tape, choosing suitable playback equipment, making adjustments when needed, and knowing when not to push a fragile cassette further. For irreplaceable recordings, the priority should be preserving as much as possible without creating additional damage.

Hernandez Video brings more than 35 years of hands-on audiovisual experience to legacy media, including recordings that need patient handling rather than a quick, automated transfer. Families deserve clear communication about what can be saved, what may need repair, and what the finished files will be like.

Choosing the right digital delivery format

The best delivery choice depends on how you plan to use the recordings. If your main goal is listening and sharing, common digital audio files are simple to play on most devices. If several relatives want copies, separate files labeled by tape and side can prevent confusion.

For long-term preservation, keep more than one copy. Save the files on your computer, an external drive, and a reputable cloud storage account if you use one. Digital files are easier to duplicate than cassettes, but they still need to be organized and backed up. Name files clearly with the person, event, and approximate date rather than relying on labels like “Tape 1” or “Side B.”

You may also want a disc copy for a family member who prefers a physical format. There is no single best option for everyone. The important thing is choosing a format your household will actually use and keeping a protected copy for the future.

Give the voices a place in family life

Once your recordings are digital, do not let them disappear into an unnamed folder. Play a grandparent’s story during a family gathering. Pair an old cassette interview with scanned photographs. Share a meaningful clip with siblings or cousins. A voice can carry personality, humor, accent, and emotion in a way that a written memory cannot.

Set aside the tapes that matter most and have them checked before another year passes. The cassette in the back of the closet may hold a voice your family will be grateful to hear again.

How to Transfer 8mm Film to Digital Safely

A small film reel can hold a child’s first steps, a wedding exit, a military homecoming, or a holiday gathering with relatives who are no longer here. To transfer 8mm film to digital is to give those moments a future beyond the projector, the closet shelf, and the fading film stock itself.

The process is more involved than simply playing a reel and recording it. Old film can be fragile, shrunken, curled, dusty, or damaged at the splice points. The right approach preserves the character of the original while creating files your family can easily watch, copy, and share on modern devices.

First, Identify What Kind of Film You Have

People often call every small home-movie reel “8mm,” but there are usually two different formats: Regular 8mm and Super 8. Both are common family-film formats, yet they have different film dimensions and sprocket-hole patterns. A reel may also contain sound, especially if it is Super 8 film made later in the format’s history.

You do not need to become a film expert before asking for help. A few details can make identification easier: the reel diameter, any wording on the box, the approximate date of the footage, and whether you remember hearing sound when it was projected. Keep original boxes, labels, and notes with the reels. A handwritten date or family name may be just as valuable as the images on the film.

Film is often stored in 3-inch, 5-inch, or 7-inch reels, although reel size does not confirm the format by itself. Do not force a reel onto a projector just to test it. If the film feels brittle, smells strongly of vinegar, has white residue, or will not unwind smoothly, it needs careful inspection before it runs through any equipment.

Why Film Condition Matters Before Transfer

Unlike a videotape, film is a physical strip that moves through rollers, gates, and sprockets. Every pass through poorly maintained equipment can add scratches or stress weak perforations. Older splices can separate without warning, and a reel that has been tightly wound for decades may not feed evenly.

A careful transfer begins with evaluation. The film should be checked for dust, mold, warping, broken splices, torn perforations, and signs of deterioration. Minor repairs, such as replacing a failed splice, can often be completed before scanning. More serious damage may require a slower, more specialized approach.

Storage history matters, too. Film kept in a hot Florida garage, attic, shed, or storage unit may age faster than film stored in a cool, dry room. Heat and humidity do not automatically mean the footage is lost, but they are good reasons not to wait another decade. Once deterioration progresses, recovery becomes more difficult and the picture may become less stable.

How to Transfer 8mm Film to Digital

There are several ways to convert film, and the best one depends on the condition of the reels, your expectations, and how much time you want to spend on the project.

The simplest method is filming a projected image on a wall or screen. It may be tempting, especially when a projector is already available, but the results often show flicker, uneven brightness, soft focus, screen texture, and keystone distortion. It can be useful for a quick preview, but it is rarely the best choice for irreplaceable family footage.

A home film scanner is a step up because it captures the film directly rather than recording a projection. However, consumer machines vary widely in image quality and can be time-consuming. You will need to monitor the transfer, manage reels, check for jams, and learn how the scanner handles exposure and frame rate. For a few short reels in good shape, a careful do-it-yourself project may make sense. For a large family collection, damaged film, or footage you cannot replace, professional frame-by-frame transfer is usually the safer choice.

Professional transfer equipment captures individual film frames and assembles them into a digital video file. This avoids the familiar flicker that can happen when a camera records a projector. A skilled technician can also watch for broken splices, unstable film movement, color shifts, and other issues that affect the final result.

The goal is not to make a 1960s home movie look like it was shot yesterday. Grain, soft focus, and the warm look of vintage film are part of its history. Good transfer work respects that original appearance while producing a clean, stable, watchable digital copy.

Ask About Resolution and File Delivery

Resolution is worth discussing, but it should not become confusing. A higher-resolution scan can preserve more detail from the film and can be a wise choice for especially meaningful footage. At the same time, the final quality is limited by the condition and original sharpness of the film. A blurry reel will not become crisp simply because it is scanned at a larger size.

For most families, an HD digital file is practical and easy to view on televisions, computers, tablets, and phones. If you want greater flexibility for editing, future projects, or archival storage, ask whether a higher-resolution option is available. It also helps to ask for a common video format that will be easy to use for years, along with a clearly labeled folder structure by reel, date, or event.

If your film has sound, confirm that the transfer process supports it. Magnetic sound stripes can deteriorate or separate from the film, so sound may need its own careful evaluation. Silent film should remain silent unless you choose to add music later. The laughter, gestures, and faces are often enough.

Prepare Your Reels Without Taking Risks

Before sending or bringing in your film, organize it gently. Number each reel and make a simple written list with anything you know about it: “Christmas 1974,” “Grandpa fishing,” “Wedding – possibly 1968,” or “Unknown family picnic.” Uncertain notes are still helpful. They give the people handling your collection context and help your family identify footage after the transfer.

Avoid taping labels directly onto the film or trying to clean it with household products. Film cleaners, lubricants, and mold removal methods are not one-size-fits-all solutions. The wrong product can leave residue, affect the image, or make a later professional transfer harder.

If you are shipping reels, place each one in a protective container or bag, prevent reels from moving inside the box, and include your inventory. Do not leave film in a mailbox, on a porch, or in a hot vehicle for longer than necessary. Personal films deserve the same attention you would give a box of old photographs or a family heirloom.

Preserve More Than One Copy

A digital transfer is the beginning of preservation, not the finish line. Hard drives fail, USB drives get misplaced, and computers are replaced. Keep at least two copies of your finished files in separate places. For example, you might keep one copy on a home drive and another with a trusted family member or in secure online storage.

Keep the original reels as well. Even after successful digitization, the film is still the original source and may be useful if technology improves or a future family member wants a new scan. Store reels upright in labeled containers in a cool, dry indoor location. Avoid basements with moisture, attics with extreme heat, and garages with large temperature swings.

It is also helpful to make the files easy for others to understand. Rename vague files such as “Reel003.mp4” to something more meaningful when possible. Add dates, names, locations, and short descriptions. Your grandchildren may recognize a face one day, but they will be grateful to know who they are seeing.

When Professional Help Is Worth It

Professional help is especially valuable when film is damaged, the collection includes dozens of reels, or the footage marks a once-in-a-lifetime event. It can also save considerable time. Watching, loading, and managing even a short reel takes patience, and a full collection can become a major project.

At Hernandez Video, decades of hands-on experience with aging media guide the careful handling of family films and other treasured recordings. The work is not simply about creating a file. It is about reviving and safeguarding the moments your family may have forgotten they could see again.

Do not wait until a birthday, memorial, reunion, or estate deadline forces a rushed decision. Choose one reel, identify what it contains, and take the first careful step toward preserving it. The faces on that film have waited long enough to be seen again.

MiniDV Tapes to Digital for Family Memories

That small cassette labeled “Christmas 2001,” “Baby’s First Steps,” or “Dad’s Retirement” may look harmless in a drawer. But MiniDV recordings depend on a working camcorder or deck, clean tape paths, and a format that has become increasingly difficult to play. Converting MiniDV tapes to digital is not just about clearing out old equipment. It is about making sure the voices, expressions, and everyday moments your family recorded can still be watched years from now.

MiniDV was a popular camcorder format from the late 1990s through the 2000s. It offered impressive picture quality for its time, which is why so many families used it for birthdays, school performances, vacations, weddings, and home movies. The problem is not that every tape suddenly fails on the same day. The problem is that each passing year makes the tapes and the equipment needed to view them less dependable.

Why MiniDV Recordings Need Attention Now

A MiniDV tape stores video on magnetic tape. Magnetic media can gradually lose signal, especially when it has been exposed to heat, humidity, dust, smoke, or unstable storage conditions. A tape can also develop wrinkles, stretching, edge damage, or mold. Even when a cassette looks fine from the outside, its recording may have playback errors that only appear when it is placed in a camcorder.

The other concern is the hardware. MiniDV camcorders and decks have moving parts that wear down. Playback mechanisms can have dirty heads, failing motors, damaged loading assemblies, or alignment problems. A tape played in a poorly maintained machine can be at risk of being chewed, snapped, or recorded over by mistake.

For many families, the real turning point is simple: they find a MiniDV tape but no longer own the camcorder. Or they still have the camcorder, but its battery is gone, the charger is missing, and connecting it to a modern television or computer is no longer straightforward. A digital file removes that access barrier while there is still time to capture the recording properly.

MiniDV Tapes to Digital: What the Process Involves

A quality transfer begins with identifying the cassette and inspecting its condition. MiniDV tapes are small, but they are not all recorded the same way. Most consumer MiniDV recordings use standard definition DV, while some later camcorders recorded high-definition HDV. The correct playback equipment and capture method matter because they help preserve the original recording as faithfully as possible.

The tape is played in compatible equipment and captured in real time. A one-hour tape takes roughly one hour to transfer because the video must be read from beginning to end. During capture, an experienced technician watches for dropped frames, tracking issues, audio problems, damaged sections, and unexpected breaks between recordings.

A transfer can preserve the video as a practical digital file for everyday viewing, such as MP4, or as a higher-quality master file for long-term storage and editing. The best choice depends on what you want to do with the footage. Families who mainly want to watch and share videos often prefer files that play easily on computers, smart TVs, and phones. If you may create a documentary, memorial video, or detailed family history project later, keeping a higher-quality master is a wise extra safeguard.

Digital transfer preserves what is on the tape. It cannot create detail that was never recorded, and it cannot fully erase severe damage. However, careful playback and capture can prevent unnecessary loss and give your family the best possible version of the material that remains.

Do Not Assume Your Tapes Are Ready to Play

It can be tempting to buy a used MiniDV camcorder online and start transferring tapes at home. For a small collection of tapes in known good condition, that route can work if you are comfortable troubleshooting older video equipment. It also requires the correct cables, capture hardware, computer settings, storage space, and patience for real-time recording.

The risks increase when tapes are old, valuable, or stored in an attic, garage, shed, or damp closet. If a cassette has mold, a cracked shell, loose tape, a broken leader, or signs that it has been previously damaged, do not force it into a camcorder. A stuck tape can quickly become a broken one.

It is also common to discover that recordings were made in different modes or that a tape contains footage from more than one camcorder. Some playback issues come from differences in the original camera rather than from permanent tape damage. This is one reason professional handling can save time and reduce anxiety when the recordings are truly irreplaceable.

Preparing Your MiniDV Collection for Transfer

Before sending or bringing in your tapes, take a few minutes to organize them. Group cassettes by family, event, or approximate year. If labels are faded, write down anything you remember: the child’s name, the location, a holiday, a school, or the name of the person who recorded it. Those notes can make the digital files much easier to identify later.

Avoid placing adhesive notes directly over moving parts or openings in the cassette shell. Keep tapes upright in their cases if you have them, and protect them from extreme heat and moisture. Do not rewind or fast-forward a tape repeatedly just to see what is on it, particularly if you are unsure of its condition.

If some tapes are blank, partially recorded, or contain television footage mixed with family video, say so. You may prefer to transfer everything for completeness, or you may want to prioritize only the recordings that matter most. There is no wrong choice. The right approach is the one that protects your meaningful footage and fits your family’s goals.

Choose Digital Files You Will Actually Use

A transfer is most useful when the finished files are easy to find and watch. Ask how the videos will be delivered and how they will be named. Clear file names such as “Smith Family – Florida Vacation – 2004” are far more helpful than a long string of numbers.

USB drives are convenient for storing a collection locally, while computer copies make it easier to edit or organize files into folders. Many families also keep a second copy on an external hard drive and another in a secure cloud account. Digital preservation works best when there is more than one copy in more than one place.

Do not rely on a single USB drive as the permanent home for a lifetime of memories. Drives can fail, get misplaced, or become outdated just like older media formats. Consider your first digital copy the beginning of preservation, not the final step.

When Repair or Extra Care Is Needed

Some MiniDV cassettes need more than a standard transfer. Tapes may have snapped, their shells may be cracked, or the tape may have become wrinkled after a camera jam. In other cases, the footage plays with intermittent picture blocks, muted audio, or sections that freeze.

A careful technician can assess whether the cassette needs repair, rehousing, cleaning, or specialized playback before capture. Results depend on the condition of the recording, but professional attention gives fragile media its best chance. This is especially valuable for wedding footage, military homecomings, recordings of loved ones who have passed away, and one-of-a-kind childhood videos.

Hernandez Video brings more than 35 years of hands-on audiovisual experience to aging formats and carefully handles the personal recordings families cannot replace. The goal is straightforward: preserve the memories with care and provide digital results that are easy to enjoy.

Make the Footage Part of Family Life Again

Once your MiniDV videos are digital, they become far more than files. A grandparent can watch old birthday parties with grandchildren. Siblings can share a long-forgotten vacation video. A family can include short clips in a milestone celebration or memorial. Footage that stayed hidden because the camcorder was inconvenient can become part of your family story again.

Start with the tapes you would be most heartbroken to lose. Put them in safe hands, keep more than one digital copy, and give those familiar voices and moving images a place in the years ahead.

8mm Camcorder Tape Transfer for Family Memories

A child’s first steps, a birthday candle wish, a grandparent laughing at a backyard cookout – many of these moments live only on small 8mm camcorder tapes tucked into a drawer. Professional 8mm camcorder tape transfer turns those recordings into digital video files that are easier to watch, share, and protect before the original tapes become too fragile to play.

These tapes may look like they have held up well, especially when stored indoors. But magnetic videotape is not permanent. Its picture and sound can fade over time, and the camcorders needed to play it are becoming harder to find in working condition. Transferring your tapes now is not about replacing the originals. It is about giving your family a dependable way to enjoy the memories they contain.

What Is an 8mm Camcorder Tape?

The name “8mm” can be confusing because it is sometimes used for both film and videotape. An 8mm camcorder tape is videotape, not an 8mm movie film reel. These compact cassettes were popular in home camcorders from the late 1980s through the early 2000s.

The three formats most often found in family collections are Video8, Hi8, and Digital8. They look similar from the outside, but they do not all record video in the same way. Video8 and Hi8 are analog formats, while Digital8 records a digital signal onto a similar-looking cassette. That distinction matters because each tape needs the right playback equipment and capture method.

A tape marked Hi8, for example, should ideally be played in a properly functioning Hi8 camcorder or deck. A Digital8 tape usually requires compatible Digital8 equipment. Using the wrong machine, a worn-out camcorder, or a questionable adapter can cause playback problems and may put an aging tape at risk.

Why 8mm Camcorder Tape Transfer Should Not Wait

Videotape relies on a magnetic coating and moving mechanical parts. With age, the binder that holds the magnetic material together can deteriorate. Tapes may also collect dust, become wrinkled, develop mold, or stick during playback. Even a tape that looks clean in its case can have hidden issues.

The more immediate problem is often equipment. Camcorders and decks wear out, replacement parts are limited, and certain models are no longer easy to service. A family may still have a box of perfectly meaningful tapes but no dependable way to watch them. Waiting until the last compatible machine fails can make preservation more complicated and more expensive.

There is also a practical reason to transfer sooner: you cannot organize memories you cannot view. Once your recordings are digital, you can identify what is on each tape, make copies for siblings, create a family tribute, or simply watch an old holiday gathering without searching for a working camcorder and the right cables.

What a Careful Transfer Process Looks Like

A quality transfer begins before the tape is played. Each cassette should be inspected for obvious damage, a broken shell, mold, missing labels, or loose tape. If a tape has visible mold or feels stuck, it should not be forced into a camcorder. Playing a damaged tape without proper attention can harm both the tape and the playback machine.

Playback With Compatible Equipment

The tape is played through format-compatible equipment that has been maintained and cleaned. This is one reason professional service is especially valuable for Video8, Hi8, and Digital8 collections. The goal is to capture what is on the tape as faithfully as possible, not simply to get an image on a screen for a few minutes.

Tracking adjustments, stable playback, and clean video heads can make a meaningful difference. A tape that appears snowy, unstable, or silent on one machine may play better on another properly adjusted unit. Results still depend on the tape’s condition and the quality of the original recording, but experienced handling gives your recordings their best chance.

Real-Time Digital Capture

Home video is normally captured in real time. A two-hour tape generally takes about two hours to transfer because the video must be played from beginning to end. This is not a shortcut process, and fast turnaround should never mean skipping the careful handling your memories deserve.

During capture, the video is converted into a modern digital format. The finished files can be delivered in a way that fits how you plan to use them, such as files for a computer, external drive, USB drive, or disc. The best choice depends on whether your priority is easy sharing, long-term storage, or watching on a television.

Attention to Tape Problems

Not every tape plays perfectly, and an honest transfer service should explain that. Dropouts, streaks, muffled audio, color shifts, and tracking lines may already be part of the recording. A transfer cannot recreate information that was never recorded or fully erase severe damage.

Still, repair and careful playback can sometimes recover recordings that would otherwise be unwatchable. Broken cassette shells, snapped leader tape, and tape-loading issues may be repairable. Mold and severe deterioration require special care and may limit what can safely be recovered. The right approach depends on the condition of each individual tape.

Choosing Digital Files, DVDs, or Both

Many families still appreciate DVDs because they are familiar and easy to give as gifts. A disc can be a convenient viewing copy for a relative who prefers using a DVD player. However, discs should not be the only home for your memories. Players are less common than they once were, and discs can scratch or fail over time.

Digital video files provide more flexibility. You can copy them to multiple drives, store additional copies in a secure location, and share selected clips with family members. Files also make future editing much easier if you want to create a memorial video, anniversary presentation, or family-history project.

For many households, the strongest plan is to keep both a convenient viewing copy and a high-quality digital file. The important part is redundancy. One file on one computer is better than one aging tape, but it is not a complete preservation plan. Keep at least two copies in separate places, and check them occasionally to make sure they remain accessible.

Can You Transfer 8mm Tapes Yourself?

Do-it-yourself transfer can work when you have a clean, compatible camcorder, the correct capture equipment, and tapes that play without trouble. It may be a reasonable option for someone comfortable troubleshooting connections, video settings, and file storage.

The trade-off is time and risk. You may need to buy used equipment with an unknown service history, learn how to capture stable video, and monitor every tape during playback. If a cassette jams or the image breaks up, it can be difficult to know whether the problem is the tape, the camcorder, the cable, or the capture device.

For irreplaceable recordings, professional 8mm camcorder tape transfer offers peace of mind. Hernandez Video brings more than 35 years of hands-on experience with aging video formats, including the careful assessment and handling that family archives deserve. This is especially helpful when tapes are unlabeled, damaged, or recorded in a format you are not certain how to identify.

Preparing Your Tapes for Transfer

Before sending or bringing in your collection, keep the tapes in their cases and avoid testing questionable cassettes in an old camcorder. If possible, group them in the order you would like them transferred. Labels such as “1994 Christmas,” “Jessica graduation,” or “Dad’s Navy reunion” can save time and preserve valuable context.

Let the transfer specialist know about any tape that has been exposed to water, heat, smoke, or garage storage. Mention tapes that have already jammed, played with poor sound, or show visible mold. Those details help determine the safest handling plan.

Do not worry if your labels are incomplete. Many families inherit a box of tapes with only a date, a nickname, or no writing at all. The first viewing after transfer can be a moving discovery. A tape labeled “summer” may hold the only video of a childhood home, a beloved pet, or a relative whose voice you have not heard in years.

Give the Memories a Future

The value of old camcorder tapes is rarely in their technical quality. Their value is in the people who appear on them, the voices in the background, and the ordinary moments that became precious with time. A careful transfer preserves more than video – it preserves a connection that your children and grandchildren can experience for themselves.

Set aside the box, gather the labels, and begin with the tapes you would be most heartbroken to lose. Those small cassettes may be waiting to bring a whole family story back to life.

How to Convert VHS Tapes to Digital Safely

A VHS tape can look perfectly fine on a shelf while the picture and sound inside it quietly become harder to recover. To convert VHS tapes to digital is not simply a matter of connecting an old VCR to a computer. It is a chance to protect birthday parties, school plays, wedding toasts, military homecomings, and the familiar voices of people you love before aging tape or failing equipment puts those moments out of reach.

VHS was built for watching, not for permanent storage. The magnetic signal can fade, tape can stretch or shed, and the VCRs needed to play it are increasingly difficult to find in good working condition. A thoughtful transfer gives your family a practical way to watch, share, and preserve those recordings without repeatedly running fragile originals through old equipment.

Why VHS Tapes Need Attention Now

Most VHS cassettes were never meant to last forever. Heat, humidity, dust, smoke, and storage in garages or attics can speed up deterioration. Even tapes stored indoors may have problems after decades. You might see snowy video, color shifts, tracking lines, muffled audio, or a tape that will no longer play correctly.

The greater concern is that a damaged tape can be harmed further during playback. If it is wrinkled, broken, moldy, tightly wound, or making unusual sounds in a VCR, do not force it through. Rewinding or playing a compromised tape without inspection can crease the tape or cause it to snap. In some cases, careful cleaning, respooling, or tape repair is needed before a transfer can begin.

There is also the issue of access. A family may still own a VCR, but not every VCR produces a stable picture, and many modern televisions no longer accept its connections. Digital files solve the everyday viewing problem while allowing the original cassette to stay safely stored as part of the family archive.

How to Convert VHS Tapes to Digital the Right Way

A quality transfer begins with the tape itself. Each cassette should be identified, inspected, and played on equipment that is clean and properly maintained. The goal is to capture the best available picture and sound, not to pretend that a home recording made in 1988 will suddenly look like new high-definition video.

The playback deck matters more than many people realize. Different VCRs track tapes differently, especially recordings made on older camcorders, long-play tapes, or tapes copied between machines. An experienced technician may need to adjust tracking, use a compatible deck, or stabilize the signal during capture. Those details can make the difference between a watchable transfer and one filled with rolling images, dropped frames, or audio that drifts out of sync.

After capture, the recording is saved as a digital video file. The file can then be trimmed at the beginning and end, divided into separate recordings when appropriate, and placed on a USB drive, hard drive, DVD, or another requested format. For families who want to send clips to relatives, a commonly supported digital file is usually the most convenient choice. For those creating a long-term archive, preserving a high-quality master file is equally valuable.

A professional transfer should respect the original recording. Light cleanup can improve usability, but excessive processing may erase the texture of a home movie or create unnatural-looking images. The right approach depends on the tape’s condition and the family’s goals.

Should You Transfer VHS at Home or Use a Professional?

A do-it-yourself setup can work for a tape that is in good condition, particularly if you already have a reliable VCR, a compatible capture device, and the patience to monitor every hour of video in real time. It may be a reasonable option for recordings that are replaceable or for people who enjoy working with older electronics.

But home transfer has trade-offs. Consumer capture devices can introduce video noise, missed frames, lip-sync issues, or files that are difficult to play later. A worn VCR can also damage a tape, especially if its heads are dirty or its transport mechanism is failing. The process takes longer than many people expect because a two-hour tape must generally be played for two hours during capture.

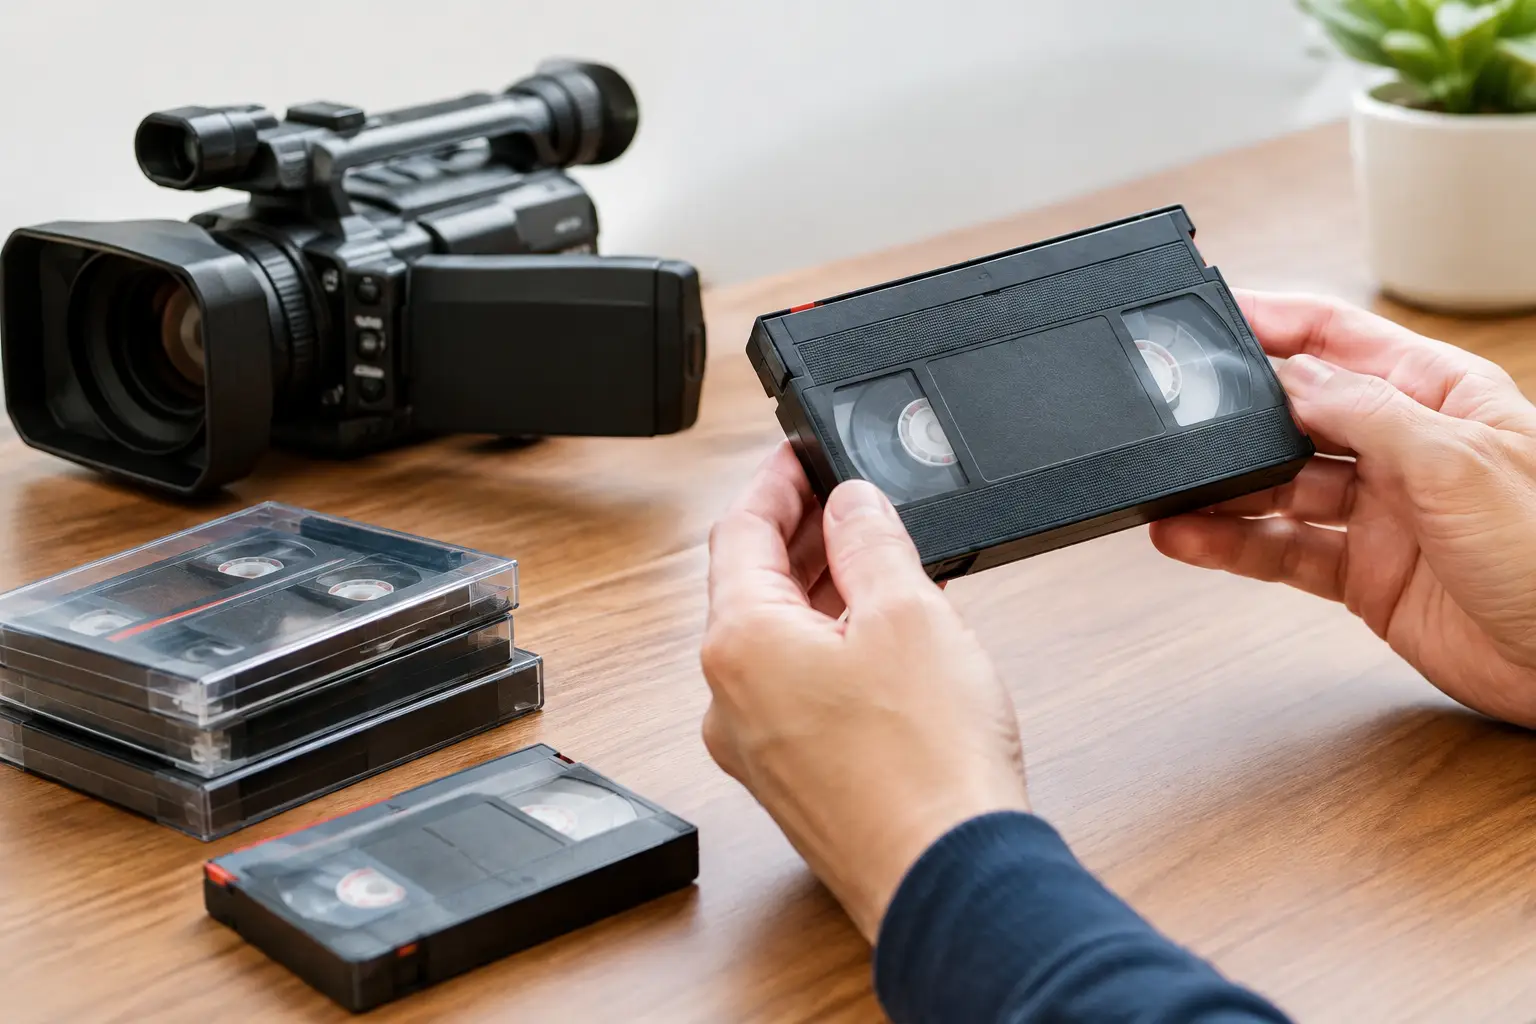
Professional conversion is often the better choice when the tape is irreplaceable, visibly damaged, or part of a larger family collection. It is also helpful when you have formats that look like VHS but are not standard VHS, such as VHS-C, S-VHS, Hi8, Video8, Digital8, MiniDV, Betamax, or professional videotape. Each format may require specific equipment and handling.

With more than 35 years of hands-on audiovisual experience, Hernandez Video can assess a tape’s condition and the best transfer approach before a small problem becomes a lost memory. Careful handling matters just as much as the final digital file.

Choose Digital Files That Will Be Easy to Use

Before starting your project, think about how your family will watch the videos. A digital video file on a USB drive is simple to use on many computers and smart TVs. It can also be copied for family members, backed up to more than one location, and used in a memorial slideshow or family-history project.

DVDs remain useful for relatives who prefer a disc player, but they should not be the only copy. DVDs can scratch, players can become obsolete, and a disc does not provide the same flexibility as a digital file. If you choose discs, ask for digital files as well.

File quality is another decision worth discussing. Very small files are easy to store and share, but heavy compression can soften already-limited VHS images. Larger, higher-quality files preserve more of what is on the tape, though they require more storage space. For meaningful recordings, it is wise to keep a high-quality master and use copies for everyday viewing or sharing.

Prepare Your VHS Collection Before the Transfer

A little organization makes a preservation project easier and more meaningful. Gather tapes from closets, cabinets, storage bins, and relatives’ homes. Keep them away from heat, moisture, and magnets while you sort them. If a cassette has a handwritten label, do not rely on it completely. Many family tapes were reused, mislabeled, or recorded over years apart.

Write down whatever you know about each tape: the estimated date, people shown, event, recording format, and whether the tape has known damage. Even a simple note such as “Grandma’s 70th birthday, around 1994” becomes helpful when files need to be named later. If you have several tapes from the same event, mark their sequence.

Do not attempt to remove mold yourself or use household cleaners on the tape. Mold can spread, and improper cleaning can scratch the magnetic surface. Set questionable tapes aside and let a preservation professional inspect them. The same caution applies to tapes with cracked cases, exposed tape, or a broken leader.

Back Up the Memories Once They Are Digital

Conversion is only the first part of preservation. A digital file is far easier to copy than a VHS tape, but it still needs care. Keep at least three copies: one on the delivery drive or a dedicated home drive, one on another device stored separately, and one in a secure cloud storage account if that option works for your family.

Name files clearly so they will still make sense years from now. “Tape 12” is not nearly as useful as “1992_Family_Reunion_Orlando.” Add dates, names, and locations when known. You may also want to create a simple folder for each branch of the family or each decade.

Once you have confirmed that the digital copies play correctly, store the original VHS tapes upright in a cool, dry indoor space. Do not discard them automatically. The originals may contain details that can be useful later, and keeping them gives your family an additional layer of protection.

The best time to preserve a family recording is while it can still be played, repaired when necessary, and recognized by the people who remember what it contains. Set aside one box of tapes, label what you know, and give those voices and celebrations a safe place to live for the next generation.

🎬 Creative Ways to Use Your Digitized Videos

From Family Websites to Social Media Tributes — Make the Most of Your Memories

So you’ve taken the leap and digitized your old tapes, film reels, or cassettes—amazing! That box of forgotten VHS tapes is now a treasure trove of memories neatly stored on your computer or in the cloud.

But now what?

Don’t let those digital files just sit there. Here are some fun, creative, and meaningful ways to use your newly digitized media to bring joy, connection, and even a few happy tears to your friends and family.


1. 🎞️ Create a Family Website or Digital Archive

Imagine a private family hub where everyone—from cousins to great-grandparents—can access home movies, old photos, and audio recordings anytime.

What you can include:

  • Chronological home videos
  • Interviews with grandparents
  • Scanned photos and letters
  • A family tree section

Bonus: Use tools like Wix, Squarespace, or Google Sites to keep it simple and private.


2. 🎁 Turn Clips into Personalized Gifts

Short, edited video clips can be used to create:

  • Custom video greeting cards for birthdays, anniversaries, or holidays
  • Memory books with QR codes linking to videos
  • Digital frames that loop special family moments

This is a heartfelt way to turn nostalgia into something tangible.


3. 🖥️ Create a Slideshow for Special Events

Whether it’s a:

  • Wedding
  • Graduation
  • Retirement
  • Memorial service

…a slideshow filled with old home videos and photos can bring the house down (emotionally speaking). Add some music, throw in funny captions, and you’ve got a showstopper.


4. 📱 Share on Social Media (Selectively!)

You don’t have to post the entire 2-hour tape from 1992. But short, memorable clips make great:

  • Throwback Thursday (#TBT) posts
  • Birthday tributes
  • Anniversary celebrations
  • Behind-the-scenes family moments

Just make sure to get permission from anyone featured before posting publicly.


5. 💬 Send “Memory Texts” to Family & Friends

Send a quick 20-second video clip to a sibling with a note like:

“Remember this dance battle from 1998?”
or
“Look at Dad’s hair in this clip 😂”

It’s a small act, but it sparks joy and connection instantly.


6. 🎥 Edit Together a Mini Documentary

Feeling creative? Use your clips to create a short film:

  • “The Story of Us” – a couple’s journey in video
  • “Through the Years” – your child growing up
  • “Generations” – grandparents sharing wisdom through old footage

Add voiceover, captions, and music for an extra layer of emotion.


7. 👩‍👧 Pass Down Family History to Future Generations

Upload your digital files to cloud storage (like Google Drive or Dropbox) and organize them by year or event. Add descriptions to help future family members understand the context.

You’re not just preserving media—you’re preserving a legacy.


The Bottom Line

Digitizing your tapes is just the beginning. With a little creativity, those old family memories can be repurposed into something new, heartfelt, and unforgettable. Whether you’re building a website or just sending a sweet clip to your sibling, these small acts help us stay connected to the people and moments that matter most.


Need help organizing or editing your digitized footage?
We can help you turn your digital files into gifts, slideshows, or story-driven keepsakes. Contact us today! info@hernandezvideo.com or 813-322-3794


DIY vs. Professional Media Conversion: What’s the Difference?

In today’s digital age, preserving old memories is more important than ever. Whether you have stacks of VHS tapes, film reels, cassette recordings, or boxes of old photos, converting them to a digital format ensures they are safe from deterioration and accessible for future generations. But when it comes to media conversion, should you take the DIY route or invest in professional services? Let’s explore the key differences between both options.


1. Cost Considerations

DIY Conversion

At first glance, DIY media conversion may seem like the more budget-friendly option. With the right equipment—such as a VHS-to-digital converter, a film scanner, or an audio digitizer—you can convert old media at home. These devices range from $50 to $300, depending on quality. However, additional costs for software, storage, and backup solutions can add up.

Professional Conversion

Hiring a professional service may have a higher upfront cost, but it often saves money in the long run. Professional companies invest in high-end equipment, software, and expertise to ensure the best results. Additionally, they save you time and effort, which is invaluable if you have a large collection to convert.


2. Quality & Accuracy

DIY Conversion

Home conversion kits and free software can do a decent job, but the quality of the final product depends on your equipment, settings, and technical skill. Issues like frame skipping, audio distortion, or color loss are common when using consumer-grade tools.

Professional Conversion

Professional services use state-of-the-art equipment designed to restore and enhance old media. They can remove noise, adjust colors, enhance audio, and stabilize shaky footage. This ensures that your digitized memories are as clear and high-quality as possible.


3. Time & Effort Required

DIY Conversion

The biggest downside of DIY conversion is the time commitment. Converting a single VHS tape in real time can take two hours or more. Film reels, cassette tapes, and photo scanning require even more effort, including manual adjustments, file organization, and troubleshooting technical issues.

Professional Conversion

A professional service does all the work for you. Instead of spending weeks or months digitizing media, you can simply drop off or mail your materials and receive high-quality digital files within a set timeframe. This is especially beneficial for those who are not tech-savvy or don’t have the time to manage the process themselves.


4. Risk of Damage

DIY Conversion

Old media is fragile. Mishandling VHS tapes, film reels, or photos can lead to permanent damage. Using outdated or low-quality conversion equipment can also cause irreversible errors, such as warping tapes, scratching film, or overwriting original recordings.

Professional Conversion

Experts handle delicate media with care, using specialized equipment to minimize wear and tear. Many professional services also offer repair and restoration options, ensuring that even damaged media can be salvaged.


5. File Organization & Backup Options

DIY Conversion

When converting media at home, you’ll need to manually name, organize, and store your files. Without proper backup strategies, you risk losing your digital copies due to computer crashes or storage failures.

Professional Conversion

Most professional services provide organized, high-resolution digital files on USB drives, DVDs, or cloud storage. Some companies even offer long-term archiving solutions, so you never have to worry about losing your memories.


Final Verdict: Which Option is Right for You?

  • Choose DIY if: You have a small amount of media to convert, are comfortable with technology, and don’t mind spending time on the process.
  • Choose Professional Services if: You want the highest quality, have a large collection to digitize, or prefer a hassle-free experience with expert handling and organization.

While DIY conversion may be appealing for tech-savvy individuals with time to spare, professional media conversion ensures better quality, reliability, and preservation of your priceless memories. If you’re looking for a stress-free way to digitize your media with the best possible results, a professional service is the way to go.

Need help converting your old media? Contact Hernandez Video today and let us preserve your cherished moments for years to come!

Top 5 signs your VHS tapes are deteriorating

VHS tapes hold precious memories—from birthday parties to weddings and everything in between. However, these once-reliable cassettes were never designed to last forever. Over time, environmental factors, improper storage, and the natural aging process can cause your tapes to deteriorate, putting your memories at risk.

To help you protect your priceless videos, here are the top five signs your VHS tapes are deteriorating—and what you can do about it.

1. Fading or Distorted Visuals

Have you noticed your VHS tapes playing with washed-out colors, flickering lines, or distorted visuals? These are classic signs of magnetic tape degradation. The magnetic particles that store your video data lose their strength over time, resulting in reduced video quality. If left unaddressed, these images can become permanently unviewable.

2. Audio Issues

Audio problems such as muffled sound, static interference, or complete silence are clear indicators of tape deterioration. The audio tracks are often the first to degrade, making it difficult to hear the voices or music tied to your cherished memories.

3. Sticky Tape Syndrome

Also known as “sticky shed syndrome,” this occurs when the tape coating absorbs moisture and becomes gummy. When this happens, the tape can get stuck in the VCR, causing damage to both the tape and the playback machine. If you hear unusual screeching sounds or the tape struggles to play, this might be the culprit.

4. Physical Damage

Visible signs of damage, such as wrinkles, creases, or tears in the tape, can prevent your VHS from playing properly. These imperfections often occur due to improper storage or frequent rewinding and fast-forwarding. Keep in mind that damaged sections of the tape may not be recoverable.

5. Mold Growth

If your VHS tapes have been stored in damp or humid conditions, they may develop mold. Look for white, green, or black spots on the tape reels. Mold not only damages your tapes but can also contaminate your VCR, spreading the problem to other cassettes.

What Should You Do If Your Tapes Are Deteriorating?

The good news is that your memories don’t have to be lost forever. Here are some steps to take:

  • Transfer Your Tapes to Digital Formats: Converting your VHS tapes to digital formats like DVDs or MP4 files is the best way to preserve them. Digital files don’t degrade over time, and they’re easier to share with family and friends.
  • Store Properly: If you’re not ready to digitize your tapes just yet, store them in a cool, dry place away from direct sunlight, humidity, and magnetic fields.
  • Consult a Professional: If your tapes show signs of damage or deterioration, a media conversion specialist can help salvage the content.

Preserve Your Memories with Hernandez Video Services

We specialize in media conversion services to help you preserve your priceless memories. Whether you have deteriorating VHS tapes, old camcorder cassettes, or other outdated media formats, we’ll carefully transfer your content to modern digital formats.

Don’t let time erase your memories—contact us today for a free consultation or quote!