Uncategorized Archives - Hernandez Video Hernandez Video

Uncategorized Archives - Hernandez Video Hernandez Video

video film company

transfer vhs to dvd

transfer dvd to digital

corporate video

Are Old Film Reels Safe? What Families Need to Know

That small metal can in the closet may hold a baby’s first steps, a wedding exit under a shower of rice, or a family member whose voice and smile you have not seen in years. But are old film reels safe to keep, handle, or project? Sometimes, yes. Sometimes, they need prompt attention before a treasured home movie becomes difficult, or impossible, to recover.

The age of a reel alone does not tell the whole story. Film condition depends on what it is made from, where it has been stored, and whether it has begun to break down. The reassuring news is that many family film reels can still be safely transferred when they are handled carefully by someone with the right equipment and experience.

Are Old Film Reels Safe to Store at Home?

Most consumer home movies from the 1950s forward were recorded on 8mm, Super 8, or 16mm safety film. The word “safety” matters: this film base is far less flammable than the nitrate film used in much earlier motion pictures. If your reels are clean, dry, and stable, storing them at home is generally reasonable with the right conditions.

However, safety film is not permanent. Heat, humidity, mold, chemical decay, and physical damage can all affect it. A reel may look fine on the outside while the film inside has become brittle, warped, sticky, or shrunken. That is why a quick visual and smell check is worthwhile before attempting to watch anything.

Very old film, especially film from the early 1950s or before, deserves extra caution. Some may be nitrate-based film, which is highly flammable and can continue burning even without normal oxygen exposure. Consumer reels are less likely to be nitrate than commercial motion-picture stock, but if you are uncertain about the film’s age or type, do not test it, cut it, or run it through a projector. Keep it away from heat and contact a qualified film preservation professional or your local fire authority for guidance.

The Warning Signs Your Reels Need Care

A healthy film reel should unspool smoothly and have a mild, neutral scent. It should not feel wet, gummy, or unusually stiff. You do not need to unwind an entire reel to inspect it. In fact, doing too much can cause damage. Look at the outer wraps in good light and stop if anything seems wrong.

Film deterioration often announces itself through a few clear warning signs. A sharp vinegar smell is one of the most common. This can indicate acetate film decay, often called vinegar syndrome. As the material breaks down, it can shrink and curl, making it unsafe to run through ordinary projection equipment.

Other concerns include white powder or crystals, rusted reels, mold, sticky residue, warped edges, severe fading, splices that are lifting, or film that cracks when gently flexed. A musty odor can point to mold growth, particularly if reels have been kept in a garage, attic, shed, or damp basement.

Do not assume a damaged-looking reel is beyond saving. Even when film cannot safely be projected, careful cleaning, repair, and frame-by-frame transfer may still recover much of the footage. The key is avoiding a well-meaning attempt that scratches the film, tears a perforation, or causes it to snap.

Why Projectors Can Be Risky for Aging Film

Many families still have an old 8mm or Super 8 projector and understandably want to see what is on the reel right away. The projector may work perfectly, yet the film may not. That mismatch can be costly.

Projectors pull film through sprockets, gates, rollers, and a bright lamp. A shrunken reel can bind in the mechanism. Brittle film can break. Old splices can separate, leaving loose film inside the projector. If the film is curled or warped, it may not sit flat in the gate, resulting in a poor image or a jam.

Heat is another concern. Traditional projector lamps can become quite hot. This is especially risky for film that is dry, brittle, or already chemically unstable. Repeated projection also adds wear, even when nothing goes wrong.

Watching a stable reel once on a clean, properly adjusted projector may be acceptable. But if the footage is irreplaceable, the safer choice is usually to have it inspected and digitally transferred first. A digital copy lets your family enjoy the movie again and again without putting the original through repeated mechanical handling.

Safe Storage Makes a Real Difference

The best place for home movie reels is cool, dry, dark, and consistent. Film does not do well with the extreme temperature swings common in Florida attics, outdoor storage sheds, cars, and non-climate-controlled garages. A closet inside the home is often a better starting point.

Keep reels away from direct sunlight, plumbing leaks, kitchens, laundry areas, fireplaces, and exterior walls that may collect moisture. Avoid tightly sealed plastic bags, which can trap humidity and encourage mold. If possible, store reels upright in clean, ventilated containers and label them clearly so you do not have to repeatedly open each one to identify it.

It also helps to separate any reels with a vinegar odor, mold, or visible residue from the rest of your collection. Deteriorating film can create an environment that is harmful to nearby reels. Place the questionable reel in a separate ventilated container, handle it as little as possible, and arrange for an assessment.

How to Handle Old Film Without Causing Damage

When you need to examine a reel, choose a clean, dry table away from food, drinks, pets, and children. Wash and thoroughly dry your hands first. Some people prefer clean nitrile gloves, particularly when handling visibly delicate film, but gloves can reduce your grip and make a reel easier to drop. Clean, dry hands and gentle handling are often the practical choice.

Hold the reel by its edges or hub rather than touching the image area. Never pull film quickly from the roll, and never force a reel that will not turn easily. Do not use household tape, glue, cleaning sprays, or lubricants to fix a broken splice or sticky section. These materials can leave residue that makes professional recovery harder.

If the reel is loose, broken, or tangled, place it flat in a clean box or container without trying to wind it tightly. A professional can stabilize the reel, repair splices where appropriate, and prepare it for transfer with equipment designed for aging media.

Film Transfer Preserves Access, Not Just Images

The most practical reason to transfer old film is not simply that projectors are becoming harder to find. It is that the original reel is a one-of-a-kind object. Once it fades, molds, tears, or becomes too fragile to run, there may be no second chance to retrieve those moments.

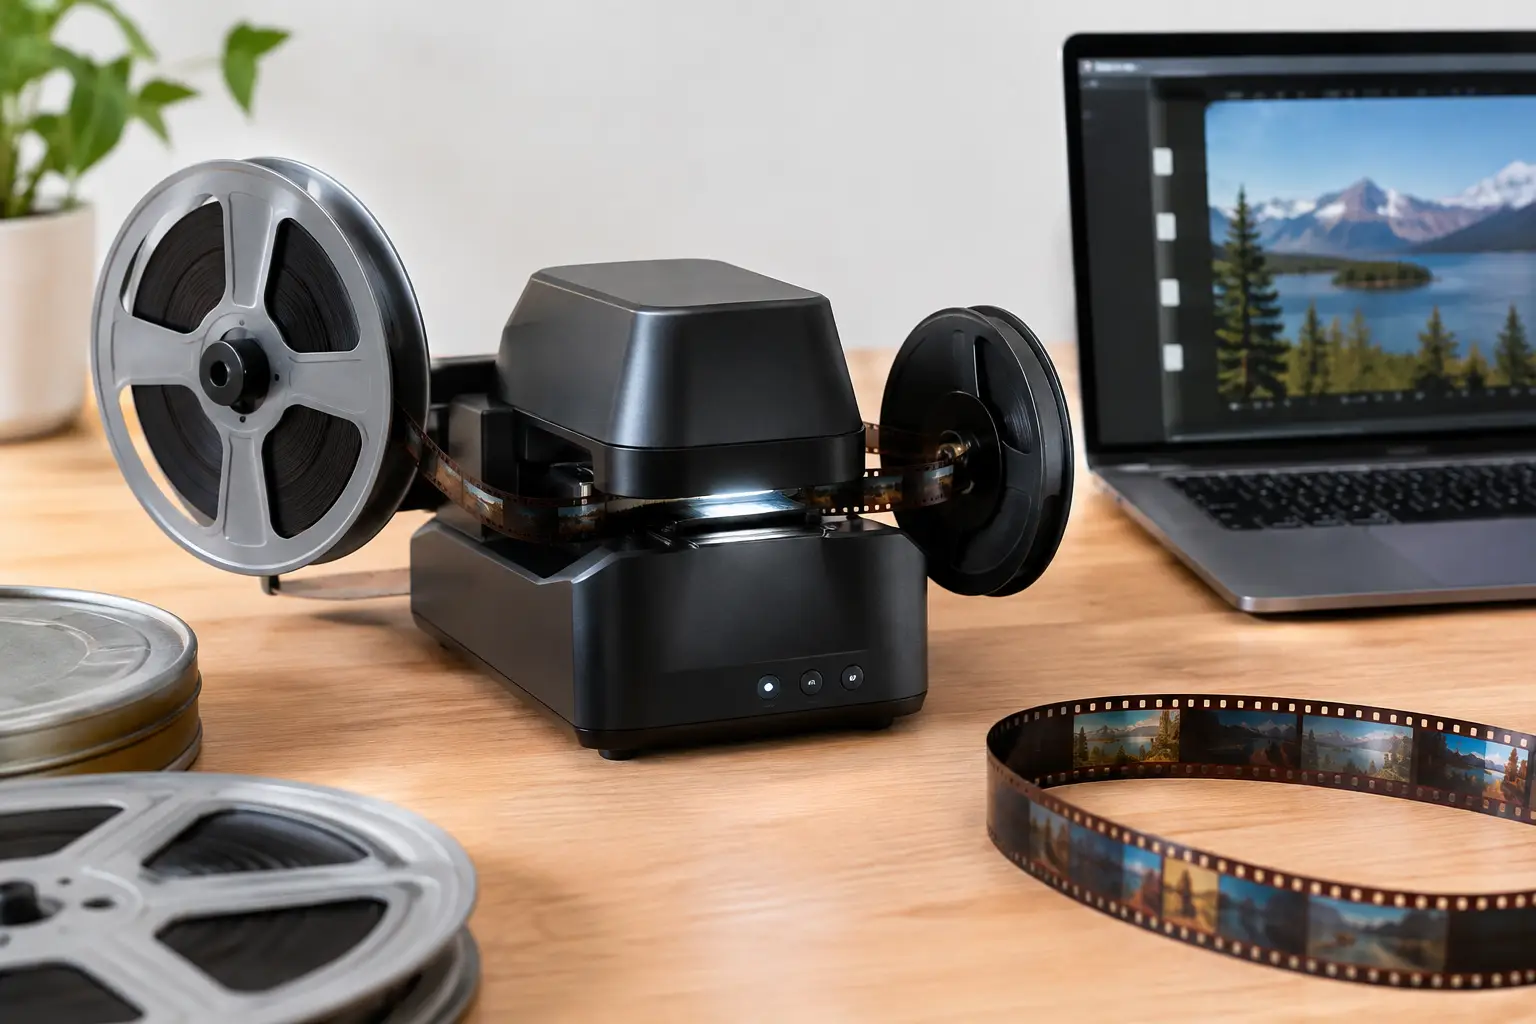
A careful transfer creates a viewable digital file while reducing the need to repeatedly handle the original. Depending on the condition and format, the process may include inspection, gentle cleaning, repair of damaged splices, image capture, and adjustments that make faded or unsteady footage easier to watch. Results depend on the condition of the source film. A transfer can preserve what remains, but it cannot always restore detail that has already been lost to severe decay.

Digital files are also easier to share with relatives, organize by year or event, and keep in more than one place. A grandson across the country can see his grandparents’ wedding film. Adult children can identify people and locations while someone who remembers the story is still able to tell it.

At Hernandez Video, aging 8mm, Super 8, and 16mm film is treated as the personal archive it is. Careful handling and knowledgeable transfer work help families move those memories into formats they can actually enjoy, without asking a decades-old projector to do all the work.

When to Get Professional Help Right Away

Do not wait for a special occasion if you notice a vinegar smell, mold, severe curling, brittleness, powder, sticky film, or a reel that will not unwind normally. These are situations where trying to view the footage at home can turn a manageable issue into physical damage.

You should also seek professional help if the reel is very old and its film type is unknown, if it was exposed to floodwater or fire, or if it contains footage that cannot be replaced. Family films, military service recordings, school events, and the only moving images of a loved one deserve a more cautious approach.

Your old film reels may be safe, but they are not invincible. A quick check, proper storage, and a careful transfer can give those flickering family moments a much longer life – and give the people you love a chance to see them clearly.

What Causes VHS Tape Damage? 8 Risks to Know

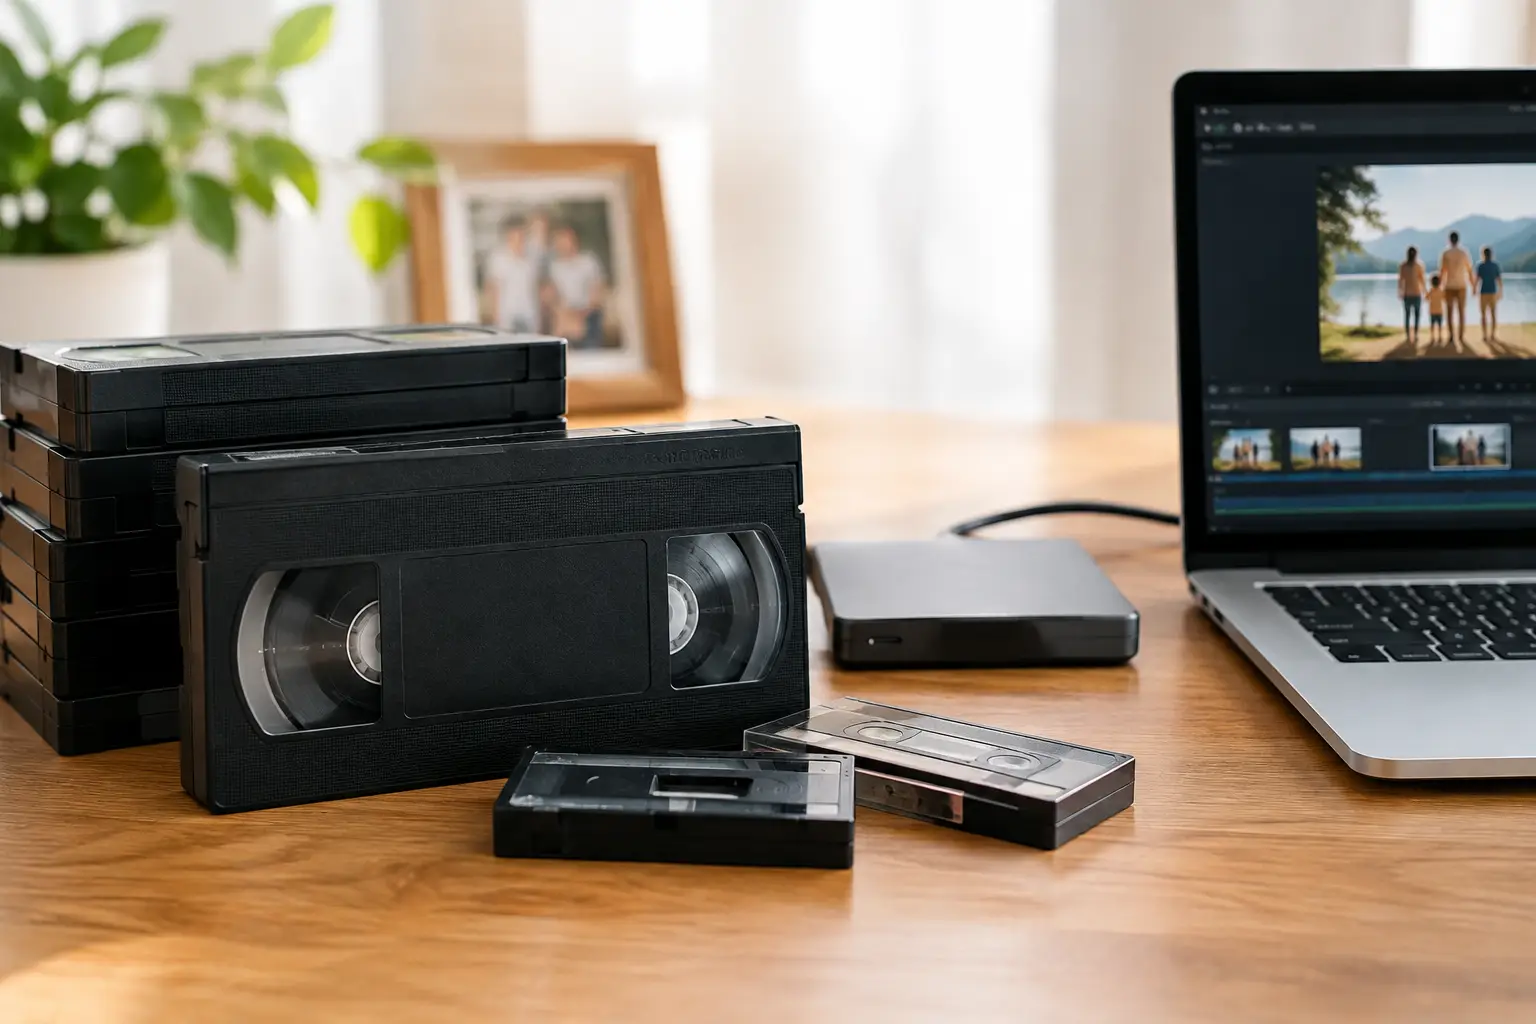
That box of family VHS tapes may look perfectly safe on a closet shelf, but the pictures inside are carried on a thin magnetic tape that ages with every passing year. What causes VHS tape damage is rarely one dramatic event. More often, it is a slow combination of heat, moisture, dust, old equipment, and ordinary handling that turns a birthday, wedding, or childhood recording into a blank screen, snowy picture, or tangled spool.

The encouraging news is that many tapes can still be safely transferred when they are handled properly. The key is recognizing the risks early and resisting the urge to force a questionable tape through an old VCR.

What Causes VHS Tape Damage Over Time?

VHS tapes are made from layers of plastic film, magnetic coating, lubricants, and adhesive binders housed in a plastic cassette. Each part can deteriorate differently. A tape may look normal from the outside while its magnetic coating has weakened, its layers have begun to stick together, or mold has formed along the reel.

Age alone does not automatically ruin a tape. A well-kept recording may remain playable for decades, while another tape stored in a hot garage for a few summers can become difficult or unsafe to play. Storage history matters as much as the tape’s age.

Heat and temperature swings

Heat is one of the most common threats to VHS. Attics, garages, sheds, cars, and non-air-conditioned storage units can reach temperatures that soften plastic cassette parts, affect tape lubricants, and accelerate chemical breakdown in the magnetic layer.

Rapid temperature changes create a separate problem. When a tape moves from a cold space into warm, humid air, condensation can form on the tape and inside the cassette. Moisture makes the tape more vulnerable to mold and can cause it to stick during playback.

A cool, dry, climate-controlled room inside the home is generally the safest place for family tapes. Keep them away from exterior walls, windows, radiators, and direct sunlight. If a tape has been in a cold or hot car, let it come to room temperature before anyone attempts to play it.

Humidity and mold growth

Florida families know that humidity is not a small concern. Excess moisture can support mold growth on VHS tape, especially when tapes have been stored in basements, garages, storage units, or damp closets. Mold may appear as white, gray, black, or fuzzy residue on the tape edges or reels, though it is not always easy to see.

Mold does more than make a cassette look dirty. It can cling to the tape surface, damage the recorded magnetic layer, and contaminate a VCR or transfer machine. Playing a moldy tape can spread spores and leave debris on the equipment’s video heads, placing other tapes at risk.

If you suspect mold, do not rewind, fast-forward, or play the cassette to “see if it works.” Keep it separate from clean tapes, place it in a bag or container, and have it evaluated by a professional experienced in tape handling and cleaning. The right approach depends on the extent of the contamination and the condition of the tape itself.

Dust, smoke, and household contaminants

Dust may seem harmless, but it can settle into a cassette and become abrasive during playback. Cigarette smoke, cooking residue, pet hair, and airborne grime can also coat tape and equipment. Over time, contamination contributes to clogged VCR heads, unstable tracking, dropouts, and scratches.

This is one reason tapes should remain in their protective cases when not in use. A cardboard sleeve is better than leaving a cassette exposed, but a fitted plastic case offers more protection from dust and accidental impact. Before storing a tape, make sure the cassette is fully inside its case and standing upright like a book rather than stacked flat in a heavy pile.

Playback Problems That Damage VHS Tapes

Sometimes the greatest danger is the VCR, not the cassette. VHS players are now aging equipment, and many have worn belts, weak motors, dirty tape paths, damaged guides, or malfunctioning loading mechanisms. A machine that chews an old movie rental tape can just as easily chew a one-of-a-kind recording of your parents’ wedding.

Dirty or worn video heads

Video heads read the magnetic signal recorded on the tape. When they are dirty, the image may flicker, show heavy snow, lose color, or cut in and out. A dirty tape path can also deposit residue onto a tape as it moves through the machine.

Commercial cleaning tapes are not a cure-all. Some are abrasive, and repeated use can wear delicate heads. If a VCR is producing poor playback, making unusual noises, or leaving visible marks on a tape, stop using it. The picture problem may be on the tape, but it may also be the player.

Tape eating, wrinkling, and snapping

A tape can become physically damaged when a VCR fails to thread it correctly or when the cassette’s internal parts are worn. The machine may pull tape out of the shell, crease it, crumple it around a roller, or fail to rewind it properly. A jammed tape can also snap when someone tries to pull it free quickly.

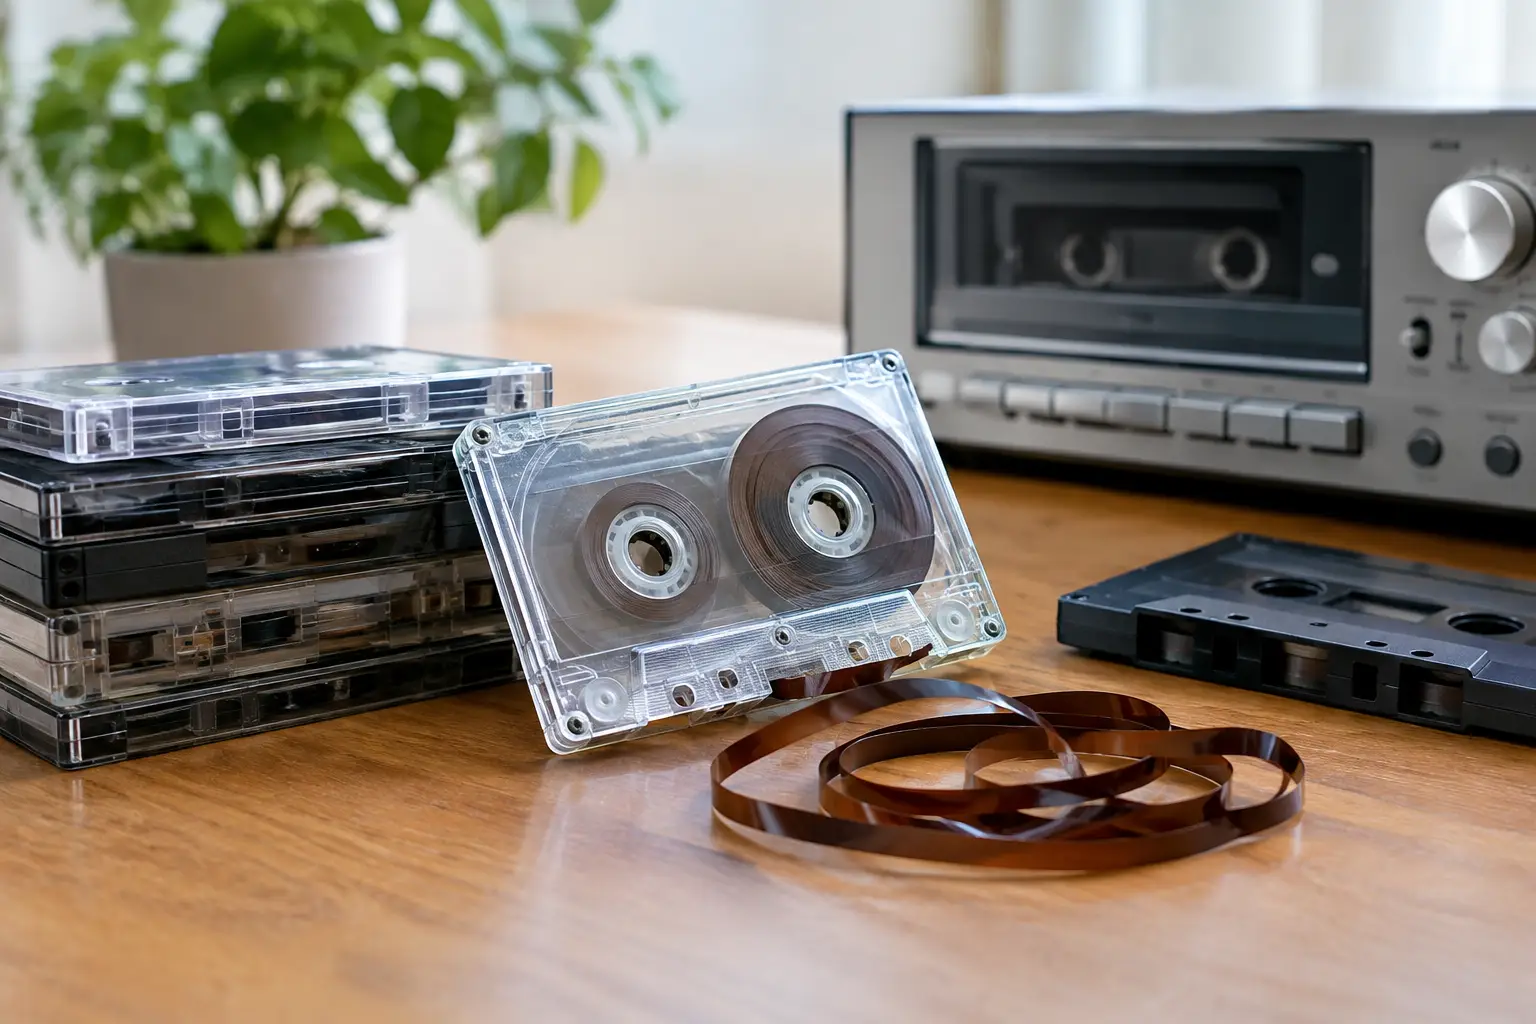
A brief section of wrinkled tape may cause a momentary distortion in the video. Severe crumpling can make playback impossible until the tape is carefully repaired. If the tape spills out of the cassette, avoid touching the shiny brown surface. Oils and dirt from fingers can leave permanent marks. Leave the cassette as still as possible and seek help rather than winding it back by hand.

Repeated viewing and fast winding

Every playback creates a little friction. VHS was designed for home use, but it was never a permanent archival format. Frequent viewing, repeated rewinding and fast-forwarding, and pausing on a still image all add mechanical wear.

A tape that plays successfully once should not be considered safe for endless repeat viewings. If it contains irreplaceable memories, a successful playback is often the best opportunity to create a digital copy. After transfer, the original can be stored as a backup while the digital version becomes the copy your family actually watches and shares.

Handling and Storage Mistakes

Physical accidents can damage a VHS cassette just as quickly as age. Dropping a tape can crack the shell, break the reel locks, or misalign the internal reels. Placing a heavy object on top of a cassette can warp the housing. A warped shell may prevent the tape from moving evenly through a VCR.

Magnetic fields are another concern, although most ordinary household electronics are less threatening than people once believed. Still, tapes should be kept away from powerful speakers, motors, industrial equipment, and magnets. More commonly, the real problem is poor organization: unlabeled tapes mixed in damp boxes, recordings stored beside cleaning products, or cassettes left in a hot vehicle after a move.

Label tapes with a light touch. Write on the cassette label or its case, not on the exposed tape door. Avoid using adhesive labels that could peel, curl, or interfere with the cassette mechanism. If a tape has a broken case but the reel appears intact, the recorded media may be recoverable through a shell replacement or other careful repair.

Warning Signs Your VHS Tape Needs Attention

You do not need to be a media technician to spot trouble. Look for visible residue on the tape reels, a cracked shell, loose or spilled tape, an unevenly wound reel, or a cassette that rattles when gently moved. During playback, warning signs include squealing, a VCR that repeatedly stops, tape being pulled out of the cassette, a picture that rolls or drops out, or audio that fades and returns.

Not every playback flaw means the recording is lost. Tracking issues can come from the player, while a short glitch may reflect a small damaged section of tape. But if the machine makes a grinding sound, displays an error, or starts to pull tape out, stop immediately. Continuing can turn a limited problem into a larger repair.

Protecting Recordings Before They Are Gone

Start by moving your tapes out of hot, damp, or unstable storage. Keep them upright in labeled cases in a conditioned room, and avoid playing them on a VCR that has not been cleaned and tested. For collections that include mold, broken shells, tangled tape, or recordings that have not been viewed in years, professional inspection is the safer choice.

A careful transfer service can assess the cassette, make appropriate repairs when possible, use maintained playback equipment, and capture the video in a format that works on modern devices. At Hernandez Video, each project is approached as more than an old cassette. It is a record of the people, voices, and moments your family cannot recreate.

The best time to protect a VHS memory is while it still plays. Set aside the tapes that matter most, store them with care, and give those voices and images a future beyond the next failing VCR.

Can Moldy Videotapes Be Recovered? What to Do

A white, gray, or fuzzy film inside a VHS cassette can make anyone pause. It may be a wedding, a child’s first steps, a parent’s voice, or a family gathering that exists nowhere else. So, can moldy videotapes be recovered? Often, yes – but the best chance of saving the recording depends on stopping further damage and avoiding the temptation to put the tape straight into a VCR.

Mold does not automatically mean a videotape is lost. It does mean the tape needs careful handling. Mold can spread through a collection, damage the magnetic surface that holds the picture and sound, and contaminate playback equipment. A professional inspection and controlled cleaning process can frequently make a tape safe enough to transfer to a modern digital file, preserving the memories before age and deterioration take more of a toll.

What Mold Does to Videotape

Videotape is made of layers. The magnetic coating stores the video and audio information, while the plastic base gives the tape its strength. In damp, poorly ventilated storage areas, mold can grow on the tape, cassette shell, and leader. Basements, garages, sheds, attics, storage units, and homes affected by flooding are common trouble spots.

At first, mold may look like dust, cloudy patches, or tiny strands along the tape reels. It can also leave behind an odor. The larger concern is what happens over time. Mold can cling to the tape surface, interfere with playback, and in severe cases contribute to shedding or physical damage. Running a moldy tape through a VCR can drag contamination across the tape path, heads, rollers, and guides. That may harm the tape and put every clean tape played afterward at risk.

The recording itself may still be intact beneath the visible growth. However, recovery is never a promise made from appearance alone. A tape with light surface mold that has been stored for years in a dry room may have a very different outlook than one that was soaked, heat-damaged, or left in a humid garage for decades.

Can Moldy Videotapes Be Recovered Safely?

In many cases, moldy videotapes can be recovered through professional cleaning, inspection, and transfer. The goal is not simply to make the cassette look better. The goal is to remove or reduce contamination safely, assess the tape’s condition, and capture the footage with the least possible stress on the original.

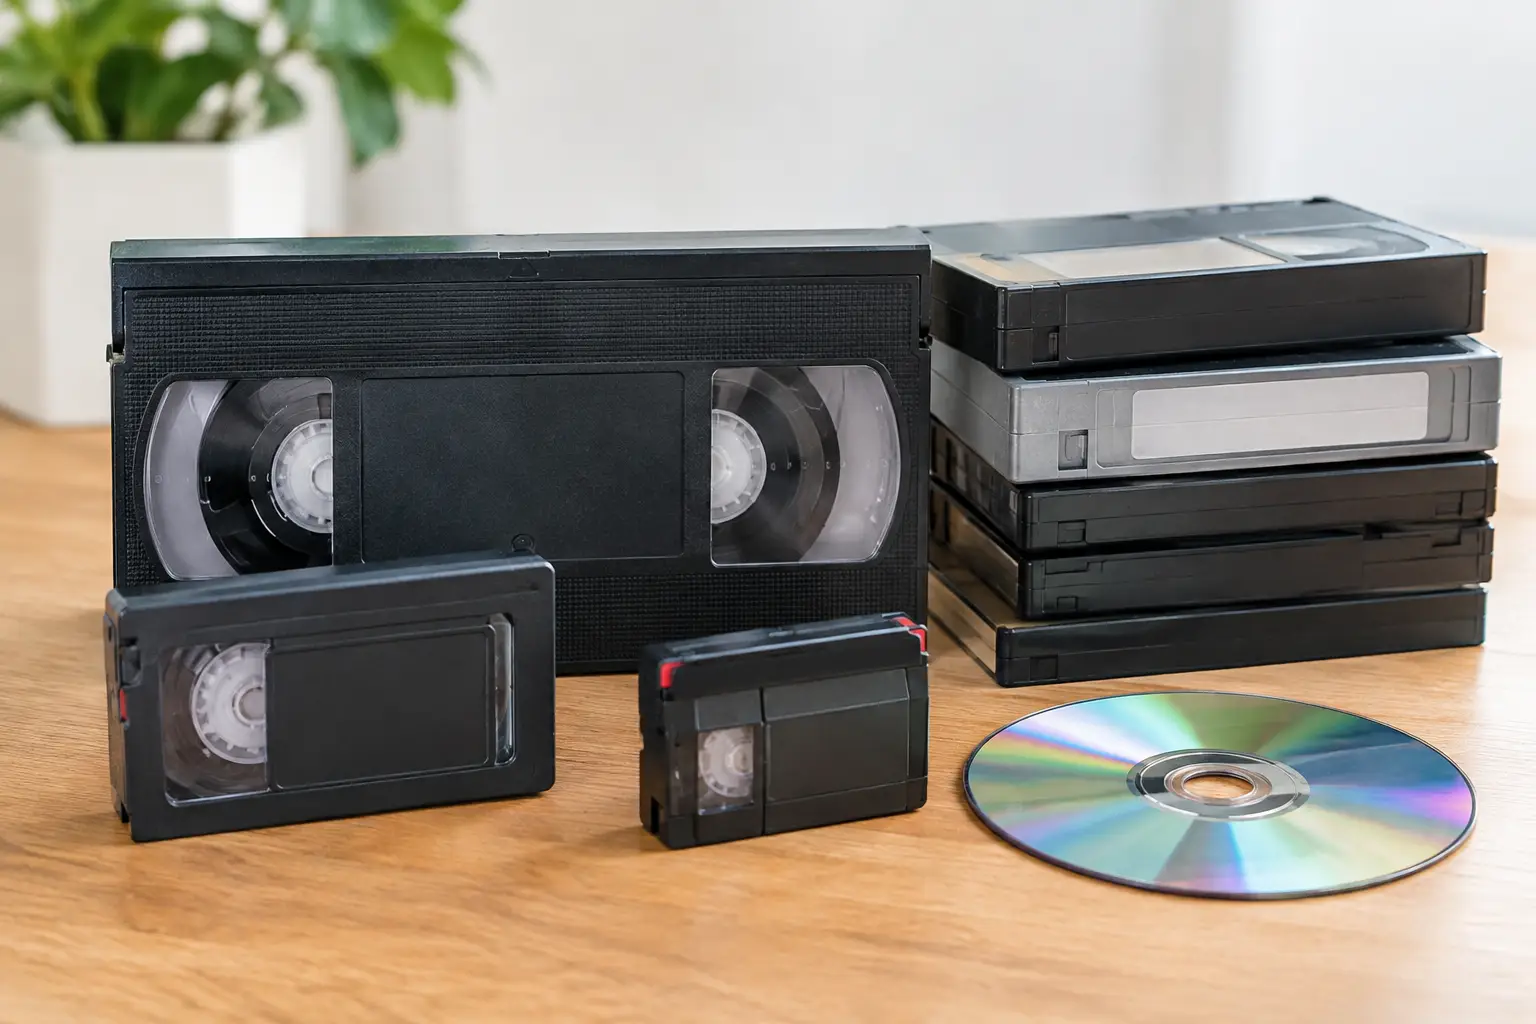
Recovery depends on several factors: the amount of mold, the format of the tape, its storage history, whether the tape has been played recently, and whether the magnetic coating is stable. VHS, VHS-C, Video8, Hi8, MiniDV, Betacam, and other formats each require the right equipment and handling. Older or rare formats may need specialized decks that are difficult to replace, which makes careful preparation especially valuable.

A professional preservation service typically begins by isolating the tape from the rest of the collection. The cassette is examined for mold, broken parts, warped housing, damaged leaders, and tape slack. When cleaning is appropriate, it is performed with methods and equipment designed for magnetic media. The tape is then tested carefully before transfer. If it can play safely, the footage is digitized so the family no longer has to rely on a fragile physical cassette.

There are limits. If mold has severely damaged the magnetic layer, portions of the image or sound may be permanently affected. A tape may have dropouts, streaks, muffled audio, or sections that cannot be recovered. Still, an imperfect digital copy is often far more valuable than waiting until the tape becomes unplayable.

Do Not Play or Try to Clean It in a Home VCR

The most helpful first step is also the simplest: do not play the tape. A home VCR or camcorder was not designed to handle contaminated media. Even if the tape seems to play at first, mold can transfer to the machine and create problems for the next cassette.

Avoid wiping the exposed tape with a cloth, paper towel, household cleaner, bleach, or water. These can scratch the surface, leave residue, or cause the tape to stick. Compressed air is also a poor solution because it can spread spores and push debris farther into the cassette. Rewinding or fast-forwarding a moldy tape can create additional friction and damage.

If you need to move the tape before having it evaluated, handle the cassette by its outer shell and keep it separate from clean tapes. Place it in a clean, dry container or bag, clearly label it, and avoid opening the cassette. Keep it away from heat, direct sunlight, and humid rooms. Do not store it in a refrigerator or freezer, where temperature changes can introduce condensation when the tape is removed.

If you discover multiple affected tapes, separate the visibly moldy ones from the rest of the collection. That small step can help protect tapes that have not yet been exposed.

When Professional Recovery Is Worth It

Nearly every moldy tape is worth assessing when the content is irreplaceable. Family recordings, military home videos, interviews with loved ones, school performances, church events, and footage of relatives who have passed away carry a value no replacement purchase can match.

Professional recovery is particularly worthwhile when you notice heavy growth, a strong musty odor, water exposure, a broken cassette shell, loose or crumpled tape, or a tape that has not been played in many years. It is also the better choice for formats you cannot play at home, such as Hi8, Digital8, MiniDV, Betacam, or older professional tapes.

The value is not limited to cleaning. An experienced technician can identify the format, select the proper playback deck, watch for signs of instability during transfer, and create a digital file that is easier to share and protect. Once the footage is digitized, families can make backup copies, organize clips, and enjoy the recording without repeatedly handling the original.

At Hernandez Video, tapes are treated as personal archives, not just old media. With more than 35 years of hands-on experience across consumer and professional formats, the focus is on careful evaluation, quality transfer, and preserving the best possible version of the memories still on the tape.

How to Protect the Rest of Your Tape Collection

Mold is usually a storage problem before it becomes a tape problem. After separating affected tapes, look at where the collection has been kept. The best environment is cool, dry, clean, and stable. Sudden swings in temperature and humidity are hard on magnetic media, as are cardboard boxes placed directly on concrete floors or against exterior walls.

Store cassettes upright in their cases when possible. Keep them away from water pipes, vents, windows, and areas where moisture collects. If a closet, garage, or storage unit smells damp, it is not a good long-term home for family videotapes. A clean indoor cabinet is generally a safer choice.

Digitization adds another layer of protection. A digital file can be copied without wearing out the original tape, but it should still be backed up in more than one place. Keep a copy on a reliable external drive and another copy in a separate location or secure storage system. The original tape may remain meaningful, but the digital version gives your family a practical way to watch, share, and safeguard the footage.

The Best Time to Act Is Before the Tape Fails

Mold can feel alarming, but it does not always mean the memory is gone. What matters most is acting carefully. Do not test the tape in a household machine, do not try harsh cleaning methods, and do not return it to a damp storage space. Have it assessed before the growth, age, or a single risky playback causes irreversible loss.

That cassette in the back of a closet may hold an ordinary afternoon that became precious with time. Giving it proper care now can help keep that moment present for the people who still need to see it.

U-matic Tape Conversion: Save Rare Video

A U-matic cassette may hold the only recording of a parent speaking at a company event, a child’s school performance, a church service, a local broadcast, or early footage from a family business. U-matic tape conversion gives that recording a future before the tape, the machine needed to play it, or both become unavailable.

Unlike VHS, U-matic was not usually a living-room format. It was widely used by schools, businesses, government offices, cable stations, production companies, and institutions from the 1970s through the 1990s. That history is exactly why U-matic collections are often overlooked until an estate is being organized, an anniversary project is underway, or someone finds a box labeled “training videos” or “master tapes” in storage.

Why U-matic Tape Conversion Is Different

U-matic is a 3/4-inch videotape format, housed in a cassette that is noticeably larger and heavier than VHS. The tape itself is analog, and it needs a correctly functioning U-matic deck for playback. Those decks are now vintage equipment. A machine may turn on but still have worn video heads, unstable tape transport, damaged rollers, or alignment issues that affect the picture.

That is why simply locating an old deck is not the same as preserving the footage. A poor playback can add tracking errors, dropouts, color shifts, or audio problems that were not present on the original recording. An unmaintained machine can also put a fragile tape at risk.

Professional U-matic tape conversion begins with the playback equipment. The cassette is checked, the tape path is inspected, and the recording is monitored while it plays. The goal is not to make a decades-old tape look as though it was shot yesterday. The goal is to capture the best available signal carefully and faithfully, then place it in a digital format your family or organization can actually use.

The Clock Is Ticking on Both Tape and Equipment

Magnetic videotape does not have a neat expiration date. Some cassettes stored in a cool, dry place may still play well after many years. Others develop issues much sooner because of heat, humidity, dust, smoke exposure, water damage, or repeated use.

U-matic tapes can suffer from binder deterioration, edge damage, warping, mold, physical breakage, and signal loss. A tape may squeal, stick, shed material, or stop moving properly through the deck. Old labels can also create confusion, especially when a collection includes similarly named tapes or handwritten dates.

There is another concern: the supply of serviceable U-matic decks continues to shrink. Parts are limited, experienced technicians are fewer, and every machine has its own condition and maintenance history. Waiting does not automatically mean a tape will fail, but it can narrow the options for recovering it successfully.

If you have tapes that matter to your family, school, church, business, or archive, it makes sense to identify them now. Even a basic inventory – tape label, date, approximate length, and a note about the contents – can make a preservation project far easier to organize.

What a Careful Transfer Process Should Include

Every U-matic tape has its own story and condition. A cassette that has been stored safely in an office cabinet may need a straightforward transfer. A tape recovered from a garage, attic, storage unit, or flood-prone area may need more attention before it can be played.

A careful service provider should evaluate the physical tape and cassette before transfer, use maintained professional playback equipment, and monitor the recording from beginning to end. This matters because a problem may appear only at a certain point in the program. A tape can look fine for 20 minutes and then develop tracking trouble, audio instability, or a damaged section near the end.

The digital capture should preserve the full program whenever possible, including natural pauses, room tone, and material that may seem unimportant at first. Those few seconds before or after an event can become unexpectedly meaningful years later. For institutional tapes, original opening slates, dates, names, and titles may also provide essential context.

After capture, the digital file should be reviewed for basic playback and completeness. Depending on the project, files can be delivered on a USB drive, external hard drive, DVD or Blu-ray, or through another agreed-upon digital delivery method. The best choice depends on how you plan to use the footage. A USB drive is convenient for many families, while organizations may need files prepared for editing, presentations, or long-term storage.

Repair and Recovery: When a Tape Will Not Play

Do not force a U-matic cassette into an unfamiliar machine if it is damaged, moldy, stuck, or making unusual sounds. Trying to power through a problem can crease, snap, or shed the tape. What looks like a minor mechanical issue can become a more serious recovery job in minutes.

Some problems can be addressed before conversion. A broken cassette shell may be replaced or repaired. Loose or damaged leader tape may need attention. A tape that has become physically unstable may require specialized handling before a safe playback attempt. The right approach depends on the condition of the cassette and the value of the content.

Recovery also has limits. If the magnetic signal has faded or a section of tape is missing, no service can recreate information that is no longer there. Still, professional handling can often recover more usable footage than a consumer setup, particularly when the problem is related to tape transport, cassette damage, or aging playback equipment.

Choose the Right Digital Format for the Footage

The phrase “digital conversion” can mean different things. Some customers want a simple file they can play on a TV or laptop. Others need footage for a documentary, a memorial video, a historical archive, or an editing project. It is worth deciding that before the transfer begins.

For family viewing, a widely compatible digital video file is often the most practical choice. It is easy to copy for relatives and can be played on many current devices. For editing or preservation work, a higher-quality file may be more appropriate, even if it takes more storage space. A smaller, heavily compressed file can be convenient, but it may not be the best master copy for important footage.

The source tape sets the ceiling for image quality. U-matic cannot become high-definition simply because it is digitized. However, a well-made capture can retain the character and detail that are present on the original tape, while avoiding the additional loss that comes from repeated analog playback or low-quality duplication.

It is also wise to keep more than one copy after conversion. Store one copy locally and another in a separate location. Label files clearly with dates, people, events, and any known details. A file named “Tape 14” may be technically preserved, but it is not very helpful to the next generation.

Questions to Ask Before Sending U-matic Tapes

Before choosing a conversion service, ask whether the provider has real U-matic playback equipment and experience with 3/4-inch tape. Ask how tapes are inspected, what happens if a cassette needs repair, and what file or disc formats are available. You should also understand whether the price is based on tape length, tape condition, or additional recovery work.

Clear communication matters just as much as equipment. A provider should be able to explain the process in plain language, tell you what can reasonably be expected from an aging recording, and treat the material as more than another item on a production line.

At Hernandez Video, more than 35 years of hands-on experience with vintage and varied media formats helps families and organizations move forward with confidence. Careful handling, practical format guidance, and responsive service are especially valuable when a cassette holds a moment that cannot be reshot.

Give the Recording a Life Beyond the Cassette

Once a U-matic tape is converted, the footage becomes easier to share and protect. A school can use historic clips at an anniversary event. A family can include a grandparent’s interview in a tribute video. A business can preserve its early training, product, or community material before the original cassettes become too fragile to use.

You do not need to know every technical detail before starting. Gather the tapes, keep them away from heat and moisture, and write down what you know about each one. The next step is simply placing those irreplaceable recordings in experienced hands while they can still be played.

Betacam SP Transfer for Family Memories

A Betacam SP transfer can bring back footage that has been sitting quietly on a shelf for decades: a wedding recorded by a professional videographer, a child’s recital, a church service, a local broadcast, an interview, or a family business event. These tapes were made for professional equipment, and the memories on them deserve more than a quick, uncertain playback. Careful conversion gives your recordings a practical future on the devices your family uses now.

What Makes Betacam SP Different?

Betacam SP is a professional analog videotape format introduced for broadcast and production work. It uses a larger 1/2-inch cassette and records better color and image detail than most consumer home-video formats. For many years, videographers, television stations, schools, churches, and corporate production teams relied on it because it delivered dependable, high-quality results.

It is often confused with Betamax because the names sound alike, but the formats are not interchangeable. A Betacam SP cassette requires the right professional deck, the right connections, and an operator who understands how older analog tape behaves. Trying to play one in the wrong machine can damage the cassette or simply produce no picture at all.

That professional quality is exactly why these tapes are worth preserving. A well-recorded Betacam SP tape may hold exceptionally clear footage for its era. Yet tape stock, storage conditions, and aging equipment all affect what can be recovered today.

Why a Betacam SP Transfer Should Not Wait

Videotape does not fail on a schedule. One cassette may still look good after 30 years, while another may develop playback trouble much sooner. Heat, humidity, dust, repeated viewing, and improper storage can gradually weaken the tape or affect the cassette mechanism.

The bigger problem is access. Professional Betacam SP decks are no longer common household equipment, and working machines need regular maintenance. As reliable playback decks become harder to find, the opportunity to transfer a tape correctly becomes more limited.

Transferring now is not about assuming every tape is already damaged. It is about making a digital preservation copy while the original can still be read. Once your video is digitized, you can watch it without running the cassette again and again. You also have the option to share copies with children, relatives, classmates, or fellow church members without putting the original tape at further risk.

A Good Transfer Begins With the Tape Itself

A professional transfer is not just a matter of connecting a deck to a computer. Each tape should be inspected before playback. The cassette shell may be cracked, the leader may be loose, or the tape may have been stored in a garage, attic, or damp closet. These issues do not always prevent recovery, but they should be handled with care.

Older tape can also have playback concerns such as shedding, wrinkling, tracking instability, or dropouts. A dropout is a brief loss of picture or sound caused by a damaged area of tape. Some flaws are part of the original recording and cannot be removed completely. Others may be reduced through proper deck alignment, signal correction, and careful monitoring during capture.

This is where experience matters. The goal is not to promise that every aging tape will look brand-new. The goal is to get the best possible playback from the tape you have, while protecting an irreplaceable original from unnecessary stress.

The Right Deck Makes a Difference

Betacam SP tapes were designed for broadcast-grade playback equipment. A maintained deck can provide a cleaner, more stable signal than makeshift conversion methods. Professional equipment also gives the technician more control when a tape has tracking issues or needs closer attention.

During capture, the analog signal is converted into a digital video file. Color, brightness, audio levels, and picture stability may be checked so the finished file is comfortable to watch. If the source has a soft image, tape noise, or other age-related limitations, those characteristics may remain. Preservation is about keeping the authentic recording available, not turning a 1990s videotape into modern high-definition footage.

Choosing the Best Digital Format for Your Footage

The right delivery format depends on how you plan to use the video. For most families, an easy-to-play digital file is the most useful choice. It can be viewed on a computer, smart TV, tablet, or phone and copied for family members.

A high-quality preservation file may also make sense when the footage has historical, professional, or production value. This can be especially helpful for original camera masters, local news segments, performance recordings, interviews, or a family archive with many tapes. Larger files take more storage space, but they preserve more of the original captured signal for future editing or reformatting.

Some customers also appreciate a DVD or Blu-ray for straightforward living-room viewing. Discs can be convenient gifts for relatives who prefer a familiar player, but they should not be the only copy. Digital files stored in more than one location offer better long-term flexibility.

A practical preservation plan often includes a watchable digital file, a backup copy, and the original cassette returned to you. Your original tape remains the source record, while the digital version becomes the copy you can enjoy and share.

What to Gather Before Sending Tapes In

Before arranging a Betacam SP transfer, take a few minutes to organize what you have. If you know the subject, approximate date, or recording location, write it on a note or label. Even simple descriptions such as “Grandma’s 80th birthday, 1998” or “School band performance” can make your new digital library much easier to search later.

Keep tapes in their cases whenever possible. Do not use adhesive tape on the actual videotape, and do not try to open a cassette shell if something looks out of place. A loose label or damaged case is worth mentioning, but home repairs can create bigger problems.

If your collection includes other formats, such as VHS, VHS-C, Hi8, MiniDV, Digital Betacam, or 8mm film, separate and label them. Many families have a mixture of formats from different cameras, videographers, and years. Identifying each group helps ensure every recording receives the correct treatment.

When Your Tapes Need Extra Attention

A tape that has mold, a broken shell, snapped tape, or severe playback problems may need repair or special handling before transfer. This does not automatically mean the recording is lost. It does mean the work should be evaluated carefully before it goes into a deck.

If a cassette was stored in extreme heat, exposed to water, or smells musty, avoid playing it at home. Mold and debris can contaminate playback equipment and damage the tape further. Set it aside in a dry place and let a preservation specialist assess the condition.

There are also cases where the original recording itself contains camera problems, poor lighting, weak audio, or a tape change in the middle of an event. A thoughtful transfer preserves what is present, while making sensible efforts to provide the clearest result the source allows. Honest expectations are part of careful preservation.

Preserve the Story, Not Just the Video

A Betacam SP cassette may look like a small black box, but it can hold a once-in-a-lifetime moment. It may be the only recording of a loved one speaking, a wedding toast that makes everyone laugh, a child’s first performance, or a community event that no longer exists anywhere else.

At Hernandez Video, more than 35 years of hands-on experience with vintage and professional media helps families protect those recordings with careful playback, quality-focused conversion, and personal service. If you are unsure whether your cassette is Betacam SP or another format, it is always better to ask before trying to play it.

Label the tapes you can identify, store them safely, and begin with the recordings that would be hardest to replace. The best time to preserve a memory is while it can still be played, shared, and heard by the people who matter most.

Stage Performance Videography Services That Deliver

The curtain rises once. A dancer lands a difficult sequence once. A young singer finds the confidence to carry a final note across the room once. Stage performance videography services preserve those moments for families, performers, directors, and audiences long after the house lights come up.

A stage production is not like a casual event. Lighting changes quickly, performers move across a wide area, and the sound system may be excellent in the room while being difficult to record cleanly. A good performance video has to respect the work onstage without distracting the audience or missing the details that made the show meaningful.

Why Stage Performances Need a Different Approach

Whether it is a school musical, dance recital, church program, theater production, concert, or community showcase, every performance has its own rhythm. A single camera placed at the back of the room can document the event, but it may not capture facial expressions, choreography, entrances, or the connection between performers. On the other hand, too many moving cameras can become a distraction in an intimate venue.

That is why planning matters. The right coverage depends on the size of the stage, the seating layout, the lighting design, the number of acts, and how the finished video will be used. A family may want a keepsake of one child’s recital. A theater group may need a full record of its production for cast members, sponsors, auditions, or future promotion. Those are different needs, and they should not receive the same one-size-fits-all approach.

Stage lighting creates another challenge. Bright spotlights, deep shadows, colored gels, and sudden blackouts can confuse cameras that are left on automatic settings. Experienced videography accounts for those changes so skin tones remain natural, costumes are visible, and the picture does not constantly brighten and darken at the wrong moment.

Sound deserves equal attention. Applause and audience laughter are part of a live performance, but they should not bury dialogue, music, or a soloist’s voice. Depending on the venue and production, the best result may come from a carefully placed ambient microphone, a feed from the sound board, or a combination of both. The trade-off is that a board feed can be clean but may not include enough room sound, while ambient recording can feel lively but pick up coughing, chairs, and nearby conversations. Thoughtful audio mixing helps the finished program feel like the performance the audience experienced.

What Professional Stage Performance Videography Services Include

Professional coverage begins before the first audience member arrives. A videographer should understand the running order, planned intermission, special entrances, microphone setup, and any moments that cannot be missed. This preparation is especially valuable for productions with brief solos, awards, costume changes, or a finale that happens only once.

Camera placement should protect the audience experience while providing a stable, unobstructed view. A main camera may capture the full stage for continuity, while additional coverage can provide closer views of important action. Wide shots are essential in group choreography and large scenes. Closer shots bring out emotion during speeches, monologues, and musical performances. Editing those views together creates a more engaging record without losing the context of the full stage.

After the performance, editing turns raw footage into a video people will actually want to watch again. This may include balancing the color between cameras, improving audio levels, trimming pre-show downtime, adding a title screen, and organizing the show into chapters or separate acts. For a lengthy recital or showcase, chapter markers make it much easier for families to find a particular performer without searching through the entire program.

The final delivery format also matters. A digital file makes sharing and viewing simple on current devices, while DVD or Blu-ray can still be valuable for customers who prefer a physical copy or want a presentation-ready keepsake. Some organizations need multiple copies for cast members and families. Others may prefer a master file for their own archive. Clear options make it easier to choose what fits the event.

Planning Better Coverage for Your Production

The best time to discuss video coverage is before rehearsal week gets busy. Early planning gives the videographer time to learn the venue, identify useful camera positions, and coordinate with the director, stage manager, and sound team. It also prevents last-minute surprises, such as finding that a balcony is unavailable or that a camera position blocks an emergency exit.

Share the performance schedule, program, and rehearsal information when available. A written running order helps identify important transitions and lets the videographer prepare for moments that happen in seconds. If a child has a featured solo, if the cast will enter through the audience, or if an award presentation follows the final number, those details should be discussed ahead of time.

It also helps to decide what the video is for. A school may be creating a permanent archive. A dance studio may be offering videos to parents. A performer may need polished clips for an audition or portfolio. A church may want to preserve an annual Christmas program for members who could not attend. The purpose affects camera coverage, editing time, delivery format, and budget.

For Tampa-area families and organizations, Hernandez Video brings more than 35 years of hands-on video experience to productions and treasured recordings alike. That experience matters because live performance does not offer retakes. Careful preparation, dependable equipment, and attention to the details onstage help protect the results of months of practice.

Details That Make a Performance Video Worth Keeping

The value of a stage video often grows over time. A parent may first watch it to see a child in a school play. Years later, that same recording can bring back the voice, confidence, friendships, and joy of a particular season of life. For directors and teachers, it can also become a record of the work their students accomplished together.

That is why reliable coverage is about more than keeping the camera pointed at the stage. It means avoiding shaky handheld footage when stable framing is needed. It means preserving the entire number, not cutting away at the wrong time. It means recognizing that the person in the back row, the performer with one line, and the lead in the spotlight all matter deeply to someone watching at home.

A quality video does not need unnecessary effects to feel special. Clean images, understandable sound, thoughtful editing, and complete coverage allow the performance itself to lead. When titles or chapters are added, they should make the program easier to enjoy rather than compete with it.

Questions to Ask Before Booking Videography

Ask how many cameras will be used and where they will be positioned. Ask how sound will be recorded, whether the venue’s audio system can be used, and how the production team will coordinate with staff. You should also ask what is included in editing, how long delivery is expected to take, and whether digital files, discs, or duplicate copies are available.

Be clear about permissions as well. Schools, theaters, studios, and churches may have policies involving minors, copyrighted music, or distribution to families. A videographer can provide the recording, but the event organizer should confirm that the appropriate permissions and release procedures are in place.

Price should be considered alongside coverage and quality. The lowest quote may mean one fixed camera and limited editing, which can be perfectly appropriate for some small events. A multi-camera production with managed audio and detailed post-production requires more planning and labor. The right choice is the one that matches the importance of the event and the expectations of the people who will watch it.

When the final applause fades, a well-made recording gives the performance another life. It lets grandparents watch from afar, gives performers a chance to relive their proudest moments, and preserves the care that went into every rehearsal. That is a gift worth planning for before the lights go down.

DVD Duplication Small Quantities, Done Right

A single DVD can carry a family reunion, a wedding ceremony, a church performance, or the only recording of a loved one telling a story. When you need just a few copies, DVD duplication small quantities is not a lesser version of a large production run. It is a practical way to share meaningful video without ordering boxes of discs you will never use.

For many families, a small order is exactly right. You may want one disc for each child, several copies for relatives out of state, or a few extras for safekeeping. Schools, churches, performers, and local organizations often need the same flexibility: enough DVDs for the people who need them, with professional presentation and dependable playback.

Why Small-Quantity DVD Duplication Makes Sense

Large disc orders are built for retail sales, broad distribution, or major events. Personal archives and local productions rarely work that way. Ordering a modest number of DVDs lets you preserve your budget while still giving each recipient a physical copy they can play, label, and keep with other family records.

A DVD is also useful when not everyone is comfortable with digital files, cloud storage, or streaming links. Grandparents may prefer placing a familiar disc into a DVD player. An estate organizer may want a labeled disc included with family records. A church may need copies that can be handed directly to members after a service or performance.

Physical discs should not be the only preservation plan, however. DVDs can be scratched, lost, or eventually become difficult to play as equipment changes. The best approach is usually to keep a high-quality digital master as well as the DVDs. The digital file protects access for the future, while the disc gives you a simple, tangible way to share the video now.

DVD Duplication Small Quantities vs. Disc Replication

The words duplication and replication are often used interchangeably, but they describe different processes.

DVD duplication creates copies by recording a completed video file onto recordable DVD media. It is well suited to small orders because there is no need to manufacture a custom glass master or commit to a high-volume run. For a handful of copies or a modest group, duplication is typically the sensible choice.

DVD replication is a manufacturing process in which discs are pressed from a master. It can be a good fit for much larger quantities, particularly commercial projects, but it involves more setup and is generally unnecessary for family videos, event recordings, or small organizational needs.

The right choice depends on the number of discs, your deadline, how the DVDs will be used, and the type of presentation you want. A carefully duplicated small run can look polished and play reliably when the source material, authoring, media, and quality checks are handled correctly.

The Source Video Matters More Than Most People Realize

A DVD cannot add detail that was not present in the original recording. If the source is an aging VHS tape, MiniDV cassette, Hi8 recording, film transfer, or older camcorder format, the work begins long before the disc is made.

The original media should be played on the proper equipment and captured with attention to tracking, color, audio levels, and signal stability. A damaged or deteriorating tape may need repair before transfer. Skipping these steps can leave you with a DVD that faithfully reproduces problems that could have been addressed at the source.

This is especially important for irreplaceable recordings. A wedding tape from 1992, a child’s first steps, or a parent’s voice message is not something to test on random equipment. Careful transfer creates the best possible digital master from the condition of the original. That master can then be used for DVD authoring, duplicate discs, and files for modern viewing.

What Professional DVD Authoring Adds

A video file placed on a disc is not always the same as a DVD that works properly in a standard DVD player. DVD authoring prepares the video in a format designed for playback on compatible set-top players and computers.

For a simple project, this may mean a disc that starts playing as soon as it is inserted. For a longer event, a menu can make viewing easier by letting the recipient choose a ceremony, speeches, performances, or chapters. A wedding DVD, for example, might include separate selections for the ceremony, reception highlights, and special messages.

There are trade-offs. Menus and chapters can be helpful, but they are not necessary for every project. If you are duplicating a short family video for relatives, a straightforward play-on-insert disc may be the clearest option. If the program runs several hours or contains distinct segments, menus may be worth including.

Choosing the Right Number of Copies

Small quantities can mean one disc or several dozen. Before placing an order, think about who truly needs a physical copy now and whether you want extras for future occasions. It is usually wise to order a few more than your immediate count if you expect to share copies with relatives, participants, or future generations.

Consider these practical questions:

  • Will each branch of the family receive a copy, or only immediate relatives?
  • Do recipients have DVD players, or should you also provide a digital file?
  • Is the disc for personal viewing, a memorial, a school program, or a church archive?
  • Will the video need chapters, a custom title, or printed labels?

A small run is flexible. You do not have to guess at a large quantity before you know whether people will want a disc. If additional copies are needed later, keeping the completed master available makes reorders much easier.

Labels, Cases, and a Presentation Worth Keeping

The information on the disc matters. A clear title, date, and short description can prevent a DVD from becoming a mystery years later. “Family Memories” is warm, but “Hernandez Family Christmas and Interviews, 1988-1996” is far more useful when someone finds the disc in a drawer decades from now.

Printed disc labels and cases can give a small order a finished look, particularly for weddings, recitals, memorials, and church productions. For personal archive discs, clear labeling is also part of preservation. Include names, dates, locations, and the original media source when possible.

Avoid attaching thick paper labels to discs at home. They can peel, warp, or interfere with playback. A professionally printed surface or appropriate disc printing method is a safer choice for copies meant to last.

Playback Compatibility and Honest Expectations

Most duplicated DVDs are intended to play in standard DVD players, but no physical format is completely free of variables. Older players, heavily used players, and combination units can be more selective. The quality of the disc media, the way the DVD is authored, and final testing all affect reliability.

Video length matters, too. A standard DVD has limited capacity. Longer programs may require compression, which can reduce image quality, or they may be better divided across two discs. That decision should be based on the source quality and the viewing experience, not simply on trying to fit everything onto one disc.

If your recording was originally made in another country, international video standards may also need attention. Converting the source correctly before authoring can help avoid playback problems and preserve proper motion and image appearance.

A Careful Path From Old Tape to Shareable DVDs

At Hernandez Video, DVD projects can begin with the original media, not just a finished file. That matters when the recording is on VHS, camcorder tape, film, or another aging format that needs experienced handling before it can become a watchable disc.

The process should be clear: identify the source format, assess its condition, transfer it carefully, create a usable digital master, author the DVD, duplicate the requested quantity, and check the completed discs. For valuable memories, ask about keeping a digital copy in addition to your DVDs. It gives your family more than one way to enjoy and protect the recording.

A few well-made DVDs can travel farther than an old tape ever could. Put names and dates on them, share them with the people who will treasure them, and keep the master safely stored for the next time someone says, “I wish I had a copy.”

How to Convert PAL VHS to NTSC Without Damage

A PAL VHS tape from the United Kingdom, Europe, Australia, or another overseas home may hold a family wedding, a child’s first steps, or a message from someone no longer with us. To convert PAL VHS to NTSC correctly, the tape needs more than a simple connection to a US VCR or television. It needs the right playback equipment, careful capture, and a plan for how your family will watch and preserve the recording in the years ahead.

The good news is that those memories are not out of reach. With proper international video conversion, PAL recordings can be transferred into digital files and NTSC-compatible formats that are easy to enjoy in the United States. The key is protecting the original tape while making sensible choices about picture quality, motion, and playback.

Why PAL VHS Will Not Always Play in the United States

PAL and NTSC are different television standards. PAL was commonly used in much of Europe and other parts of the world, while NTSC was the standard for analog television in the United States, Canada, Japan, and several other countries.

A PAL VHS tape generally runs at 25 frames per second and uses a different line and color system than NTSC. NTSC video is typically displayed at about 29.97 frames per second. Those differences affect how a tape is read, how motion looks, and whether a television, VCR, or capture device can recognize the signal.

Putting a PAL tape into an ordinary American VHS player is not a safe test. In many cases, the cassette will not play at all because the machine cannot read the format. Even if you can see an image through certain multi-standard equipment, the picture may roll, appear in black and white, show distorted color, or have unstable motion.

This is why a proper PAL-to-NTSC transfer begins with a PAL-capable VCR or professional deck. The tape must be played in the format in which it was recorded before the signal can be captured and converted.

The Best Way to Convert PAL VHS to NTSC

For most families, the best approach is to make a high-quality digital master from the PAL VHS tape, then create a viewing copy that works comfortably on US devices. This protects the original recording and gives you more flexibility than converting only to an NTSC DVD.

The process typically involves careful inspection, playback on the appropriate PAL equipment, signal stabilization, digital capture, and standards conversion. A professional transfer service can also check for tracking issues, tape damage, and other problems that may affect the result.

Start by inspecting the tape

VHS cassettes are mechanical objects. Before playback, the tape should be checked for a cracked shell, missing leader, loose or wrinkled tape, mold, damaged reels, or a broken pressure pad. A tape that has been sitting in a hot garage, damp storage unit, or attic may need extra care before it ever enters a VCR.

Do not force a cassette that will not load or rewind. If the tape catches inside a machine, pulling it free can stretch, crease, or tear the magnetic tape. Those damaged sections may contain the only recording of a birthday party, military homecoming, family reunion, or wedding day.

Capture the PAL recording correctly

A PAL VCR reads the tape at its native speed and format. From there, the video is captured to a digital file. Better transfer setups use equipment that helps stabilize the signal, which is especially helpful with older VHS tapes that have jitter, waviness, dropouts, or inconsistent brightness.

The goal is not to make VHS look like modern high-definition video. VHS has built-in limits, and an honest transfer preserves what is on the tape without adding harsh processing that can erase facial detail or make motion look unnatural. Good work focuses on stable playback, accurate color, clear sound, and a digital file that reflects the original memory as faithfully as possible.

Create an NTSC-compatible version for viewing

Once the PAL tape is captured, the digital file can be converted to an NTSC-compatible frame rate and format. This is where experienced handling matters. Changing video standards is not simply a matter of resizing the picture.

The conversion must account for the difference in frame rate. Depending on the source and desired delivery format, software or dedicated hardware may duplicate, blend, or interpolate frames to create smoother motion. Each method involves a trade-off. Some methods preserve a more natural film-like cadence, while others reduce visible judder in fast movement. Older home video often benefits from a practical, conservative conversion rather than aggressive processing.

For many households, an MP4 digital file is the easiest final format. It can be played on computers, smart TVs, tablets, and phones, and it is simple to copy for relatives. If you would also like a disc, an NTSC DVD or Blu-ray can be authored for standard US playback equipment. Keep in mind that a DVD is convenient, but the digital file should remain part of your preservation plan.

Should You Keep a PAL Digital Master Too?

Usually, yes. If the original recording is PAL, retaining a native PAL digital master is often the wisest long-term choice. It preserves the footage closer to its original timing and gives you a clean source if you want a new viewing version later.

You can then have an NTSC-compatible copy made for family members who use older US televisions or disc players. You may also want a standard digital MP4 version that modern devices can play without caring much about the old PAL and NTSC divide.

This two-version approach is especially valuable for important recordings. A native master protects the historical source. A converted copy makes the memory convenient to watch. You do not have to choose between preservation and accessibility.

What Can Affect the Quality of the Transfer?

The condition of the tape is the biggest factor. VHS recordings naturally lose detail over time, and repeated playback can wear the magnetic coating. A tape recorded in EP or SLP speed may look softer and show more noise than one recorded in standard play. Tapes copied from other tapes may also have more generation loss.

The original camera, lighting, and recording quality matter too. A professionally shot PAL wedding video may convert very well, while a dim camcorder recording from the 1980s may have grain, color shifts, and weak audio that cannot be fully corrected. Careful transfer can improve stability and usability, but no conversion can recreate information that was never captured.

Sound should receive equal attention. PAL-to-NTSC conversion mainly concerns the video signal, but the audio needs to stay synchronized with the picture. A poorly handled conversion can cause speech and movement to drift apart, especially in a long program. Proper capture and quality checks help prevent that frustration.

Why a DIY Setup Can Be Risky

It is possible to find low-cost adapters, USB capture devices, and multi-system players. For a tape that is easy to replace, experimenting may be acceptable. For an irreplaceable family recording, the risks are higher.

Consumer capture devices can introduce dropped frames, unstable color, audio hum, or poor compression. Incompatible VCRs may fail to play the cassette properly. More concerning, an aging tape can jam in an unfamiliar machine, leaving you with both a damaged cassette and an incomplete transfer.

International VHS conversion also becomes more complicated when the tape is not actually standard PAL VHS. It may be VHS-C, S-VHS, a tape recorded on a camcorder, or a cassette from a country using a related but different broadcast system. Identifying the exact format before playback avoids guesswork and helps ensure the right equipment is used.

Give Your Family a Format They Can Use

A successful conversion is not just about changing PAL into NTSC. It is about making sure the people who matter can watch the recording without hunting for an old VCR or wondering whether their television will accept it.

Ask for digital files that are clearly named and organized. If there are several tapes, use labels that identify the event, approximate date, and people featured. Save copies in more than one place, such as a computer, an external drive, and a trusted cloud storage account. Keep the original VHS tape in a cool, dry location after transfer, because it remains the source of the memory.

With more than 35 years of hands-on experience with vintage and international media, Hernandez Video can help families turn difficult-to-play PAL VHS recordings into dependable digital keepsakes and NTSC-compatible viewing copies. The most meaningful part comes afterward: pressing play and hearing familiar voices, seeing loved ones move again, and knowing those moments are protected for the next generation.

How to Repair Broken VHS Tape Without Losing Memories

A VHS cassette can look fine on the outside while the recording inside is one pull, wrinkle, or broken splice away from being lost. If you need to repair broken VHS tape, the first goal is not getting it back into a VCR as quickly as possible. The goal is protecting the footage – a birthday, wedding, school play, military homecoming, or voice from someone you miss – from further damage.

Some tape problems can be repaired safely. Others need experienced hands and specialized playback equipment. Knowing the difference can save a cherished memory from being damaged beyond recovery.

Can You Repair Broken VHS Tape at Home?

It depends on what is broken and where the damage is located. A clean break in the clear leader tape near the beginning or end of a cassette is often a manageable repair. A broken section within recorded footage can also be spliced, but a few seconds of picture and sound at the break will be lost. The repaired tape may still play well enough to be transferred to a digital file.

A cracked cassette shell, detached reel, or loose tape can sometimes be corrected, too. However, those repairs require patience, a clean workspace, and an understanding of how the tape travels through the cassette. One misplaced screw, twisted section of tape, or fingerprint on the oxide side can create a much larger problem.

Do not attempt home repair if the tape has mold, a sticky residue, severe creasing, water damage, or tape that has been pulled out in a tangled loop. Do not put a moldy or visibly dirty cassette into your VCR. Contaminants can spread to the machine’s heads and damage other tapes afterward.

What a VHS Tape Repair Can and Cannot Save

VHS tape is magnetic tape coated with the information that creates the image and sound. It runs from one reel to another through guides, rollers, and spinning video heads inside a VCR. When the tape snaps, the recording does not disappear from the remaining sections. But the exact material at the break is gone.

A careful splice reconnects the tape so it can travel through a machine again. It does not recreate missing video, remove heavy tracking problems, or restore magnetic coating that has deteriorated. Think of it as stabilizing the recording for preservation, not making a damaged tape brand new.

That distinction matters. The best time to digitize a repaired tape is usually the first successful playback after repair. VHS is an aging format, and each additional pass through a machine adds a small amount of risk. A digital transfer gives your family an accessible copy while allowing the original cassette to be retired from regular use.

How to Repair a Broken VHS Tape Safely

Before opening the cassette, handle it by its plastic edges and keep food, drinks, pets, and loose dust away from the work area. Wash and dry your hands thoroughly. The dark, dull side of the tape carries the recording; avoid touching it whenever possible.

Start With the Right Tools

A proper repair calls for a small Phillips screwdriver, a clean lint-free cloth, a VHS tape splicing block or guide, and tape designed specifically for magnetic-tape splicing. Ordinary transparent tape, masking tape, glue, and staples are not safe substitutes. They can leave residue, create a thick bump that catches inside the VCR, or cause the tape to tear again.

A clean donor cassette of the same VHS style can be useful if the original shell is cracked or its reels no longer turn freely. The donor should be empty or contain nothing valuable, because its purpose is only to provide a compatible shell and working parts.

Keep the Tape From Unspooling

If tape is hanging from the cassette, do not pull it tight or wind it around a pencil. Open the cassette carefully while keeping the reels level. VHS cassettes contain small springs and plastic pieces near the front flap, so work slowly and keep track of how the parts are positioned.

If there is slack tape, gently turn one reel by hand to take up only enough slack to prevent loops. Do not force the reels. A tight spot may be caused by a wrinkle, damaged edge, or tape caught in the shell.

Make a Clean, Straight Splice

For a snapped tape, locate both ends and make sure neither is twisted. The shiny side should face the same direction on both pieces. Trim only the smallest amount needed to create clean, square edges. Every bit removed is recorded material that cannot be recovered.

Place the two ends in a splicing guide so they meet edge to edge without overlapping. Apply a narrow piece of archival splicing tape to the non-recorded side only. Press it down gently and trim excess material so the splice is no wider than the tape itself. A crooked or bulky splice may catch on a guide roller during playback.

If the break occurred at the clear leader, reconnecting the leader is generally less risky because no recorded picture is being cut away. If the break is in the middle of family footage, make the splice as precise as possible and plan to transfer the tape promptly.

Reassemble and Test With Care

Reassemble the shell, checking that the tape follows the same path it did before opening. The tape should be flat, centered on the reels, and free of twists. Turn the reel gently by hand to confirm that it moves without resistance.

Do not fast-forward or rewind a freshly repaired cassette at high speed. Insert it into a dependable VCR and begin playback slowly. Watch for tape chewing, unusual sounds, or picture instability that worsens. If the machine begins to pull, wrinkle, or stop the tape, eject it immediately. Continuing could turn a repairable break into a damaged section several feet long.

When a Broken VHS Tape Needs Professional Help

A home splice may be reasonable for a simple, clean break when the recording is not the only copy of an important event. But irreplaceable tapes deserve a more cautious decision. Professional repair is the better choice when footage has sentimental, legal, historical, or family value that cannot be replaced.

Mold is a clear reason to stop. White, gray, or dusty-looking growth can damage the tape surface and contaminate equipment. Severe wrinkles, creases, edge damage, snapped reels, or cassettes that have been crushed also call for professional evaluation. So does a tape that plays with repeated dropouts, rolling picture, or a persistent squeal.

An experienced preservation service can inspect the cassette, repair or replace a damaged housing, clean tape when appropriate, and use properly maintained equipment to capture the best possible signal. This is especially helpful for old home movies that may have been recorded on consumer camcorders with inconsistent tracking. At Hernandez Video, careful tape repair and transfer are approached as one preservation job: stabilize the original, capture the memories, and provide a digital format your family can use.

Digitize the Tape After Repair

A successful repair is a second chance, not a reason to return the cassette to a storage shelf and hope for the best. VHS tapes can lose magnetic signal over time, and working VCRs are becoming harder to find and maintain. A digital transfer helps protect the content from future tape breaks, worn mechanisms, and format obsolescence.

Ask for a digital file format that is easy to play and share on current devices. Consider keeping more than one copy: one on a computer or external drive, another in secure cloud storage, and a copy shared with a trusted family member. Label the files with names, dates, and locations while the details are still fresh. A file called “Grandma 80th Birthday, Tampa, 1998” will mean far more to future relatives than “VHS 12.”

Store the Original Cassette Carefully

After transfer, return the cassette to its case and store it upright in a cool, dry, stable place. Avoid attics, garages, sheds, and vehicles, where Florida heat and humidity can accelerate deterioration. Keep tapes away from strong magnets, direct sunlight, and areas prone to flooding.

Do not throw away the original immediately after digitizing. Keeping it gives you a physical backup, and future technology may sometimes recover more from a tape than was possible during an earlier transfer. Just treat it as an archive rather than a tape for routine viewing.

The most meaningful recordings are often the ones no one thought to protect until a cassette jammed or a reel came loose. If a VHS tape holds a moment your family cannot recreate, pause before pressing play again. A careful repair and timely digital transfer can keep that memory present for the people who will treasure it next.

Digitize 35mm Slides Service for Family Photos

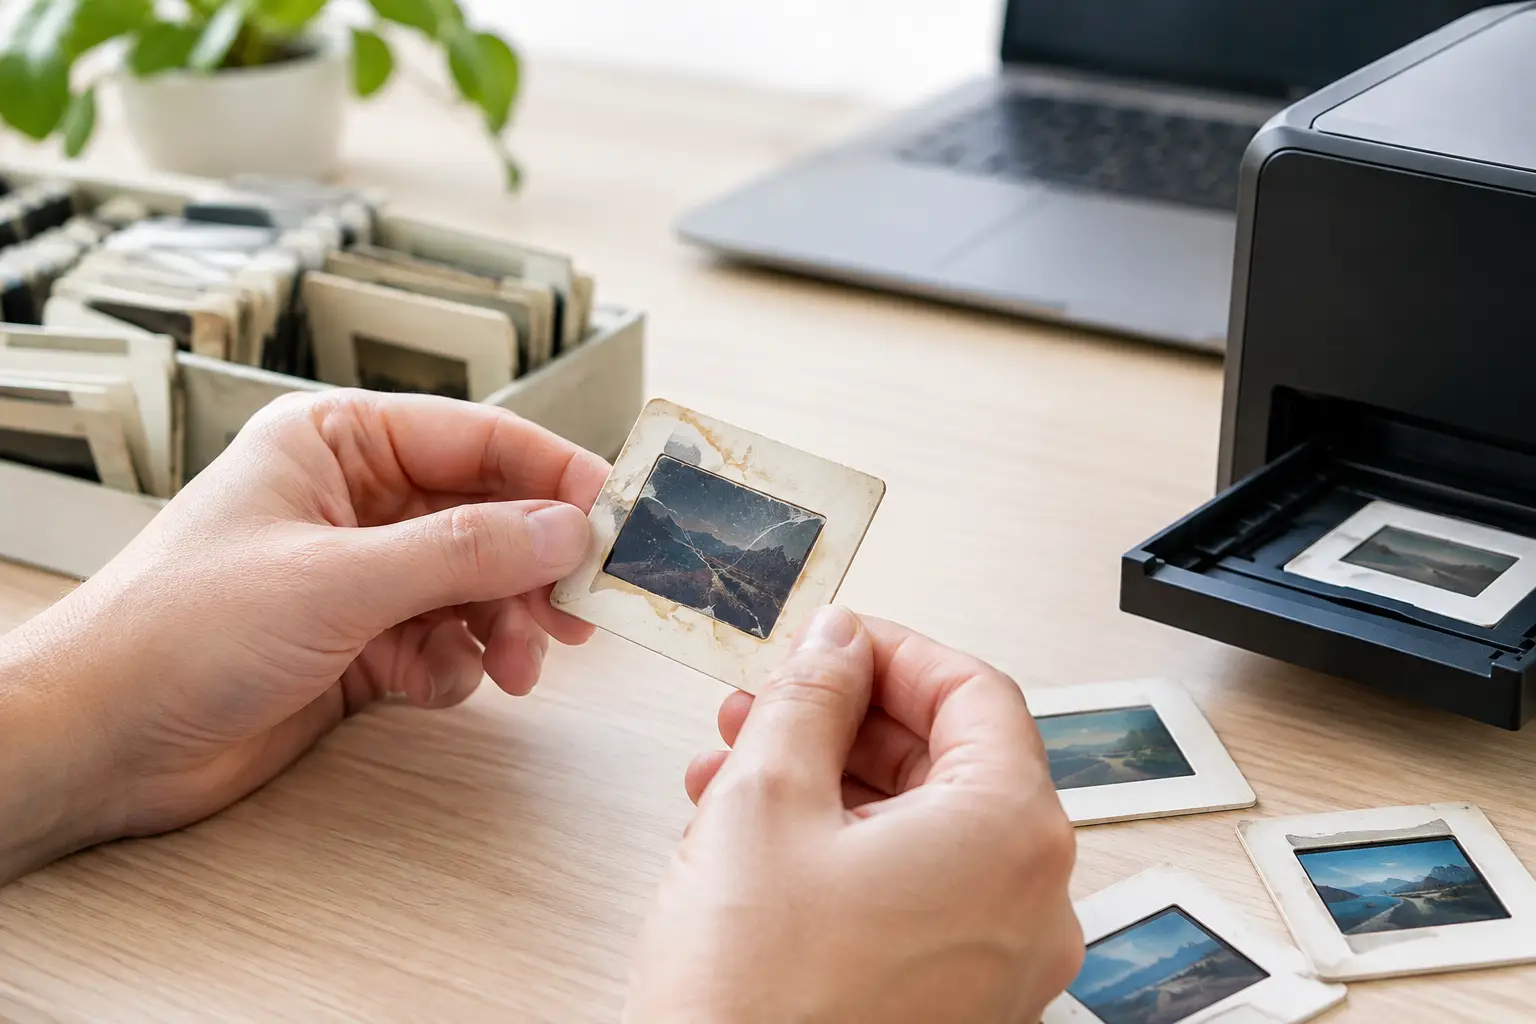
That small cardboard slide may hold the only color image of your grandparents’ wedding, your child’s first day of school, or a family vacation nobody has seen in years. A professional digitize 35mm slides service turns those tucked-away images into files your family can view, save, print, and share without repeatedly handling the originals.

For many families, slide boxes have survived decades in closets, attics, garages, and estate storage. The images may still look surprisingly good when held to the light, but the film is not immune to time. Color can shift, dust can settle into the mount, and heat or moisture can cause damage that is difficult or impossible to reverse. Digitizing is a practical way to preserve your past media memories while making them part of family life again.

Why 35mm slides deserve careful preservation

Slides were designed for projection, not for the devices we use now. A slide projector can be hard to find, replacement bulbs are becoming less common, and many families no longer have a screen or a place to set one up. Even when a projector works, every viewing session requires handling fragile film and mounts.

The greater concern is deterioration. Older slides can develop fading, yellow or red color casts, mildew, fingerprints, scratches, or dust. Cardboard mounts may warp, and plastic mounts can crack. If slides were stored in Florida heat or humidity, they may need especially careful inspection before scanning.

A digital copy does not replace the original slide, but it gives the image a much safer future. Once scanned, family members can enjoy the photographs on phones, televisions, computers, and digital picture frames. They can also create albums, make prints, send images to relatives, and preserve a copy in more than one location.

What a digitize 35mm slides service should include

Not every scanning process produces the same result. A quick scan may be enough for a casual image that will only be viewed on a phone. For a meaningful family archive, however, the condition of the slide and the quality of the scan both matter.

A professional service begins with careful handling. Slides should be kept in order whenever possible, gently cleaned of loose dust, and inspected for damaged mounts or film. This matters when the slides tell a story in sequence, such as a wedding, military deployment, school years, or a family trip.

The scanner and settings also make a difference. Resolution determines how much detail is captured from the original film. Higher-resolution scans are generally better for enlargements, cropping, and future use, while standard-resolution files may be perfectly suitable for viewing and sharing. The right choice depends on the condition of the slides and what you hope to do with the images.

Color correction is another valuable part of the process. Old slide film often changes over time, but correction should be handled with judgment. The goal is not to make a 1960s photograph look like it was taken yesterday. It is to restore natural-looking color, contrast, and brightness while respecting the character of the original image.

At Hernandez Video, slides are treated as irreplaceable family treasures, not as a stack of generic files. That hands-on approach is especially important for older, mixed, or damaged collections.

Choosing the right file format and resolution

Before sending in a collection, consider how you want to use the digitized images. There is no single setting that is best for every family.

JPEG files are convenient for everyday viewing, emailing, sharing, and online photo albums. They are widely compatible and take up less storage space. TIFF files are larger and better suited to archival work, detailed editing, or high-quality prints because they retain more image information. Some families choose JPEGs for easy access and TIFF files for their most important slides.

Resolution is similar. A moderate scan can look excellent on a television or computer screen. A higher-resolution scan is the better choice if you may want to make large prints, crop tightly into a face, or preserve the maximum detail available from a sharp original slide. Keep in mind that a high-resolution scan cannot create detail that was never captured by the original camera or has already been lost to fading and damage.

If you are unsure, it helps to think about the collection in practical terms. A box of vacation slides you want to share at a reunion may need a different approach than a set of rare family portraits, historical property images, or military photographs that deserve archival-quality copies.

Preparing slides before you send them in

You do not need to become a photo archivist before using a service. In fact, avoiding unnecessary handling is often the safest choice. Still, a little organization can help preserve context that may otherwise be lost.

Keep slides in their original groups if they are already labeled or arranged by date, event, or person. A handwritten note such as “Grandma and Grandpa, 1958” can be more valuable to future generations than a perfectly edited photo with no history attached. If there are duplicates or obvious test shots, you can separate them if you wish, but do not discard an image simply because it looks unusual. It may be the only record of a place or person.

Avoid using household cleaners, water, adhesive tape, or compressed air directly on slides. These can scratch film, leave residue, or push contaminants deeper into the mount. Slides with mold, severe warping, torn mounts, or loose film should be set aside and identified. A professional can assess the safest way to handle them.

It is also wise to count your slides approximately and keep a simple inventory of boxes, carousels, or trays. Labeling each container helps ensure that the collection returns in the same meaningful order it left.

Questions worth asking before you choose a service

Your slides may be one of a kind, so confidence matters as much as convenience. Ask how originals are handled, whether the service works with mounted 35mm slides specifically, and what type of digital delivery is available. You should also ask about turnaround time, file naming, image correction, and whether your original slides will be returned.

Clear communication is a good sign. A trusted provider should explain what can realistically be improved and what cannot. Deep scratches, heavy mold, severely faded film, and out-of-focus photographs may have limits. Honest expectations are part of quality preservation.

Local service can offer additional peace of mind for Tampa-area families who prefer to speak directly with someone about a collection. Mail-in service may be convenient for others, but whatever option you choose, make sure you understand how your slides will be packaged, tracked, stored, and returned.

Make the digital files easy for your family to use

The project is most successful when the finished files are not left on a forgotten USB drive. Keep at least two copies of your digitized slides in different places. For example, you might keep one copy on an external hard drive and another in secure cloud storage. This protects against computer failure, accidental deletion, theft, or storm damage.

Take time to add names, dates, and locations while relatives can still help identify them. You do not have to label every image at once. Start with the people and events that matter most. A folder named “Dad’s Navy Years” or “The First House, 1974” gives photographs meaning that a camera filename never can.

Consider sharing a small selection with family members right away. A slideshow for an anniversary, a print for a grandparent, or a digital album for siblings can turn preservation into a living connection. These images were made to be seen, remembered, and talked about.

Your 35mm slides have already carried family stories across decades. Giving them a careful digital future means those stories can remain close, clear, and ready for the next person who asks, “Who is that in the picture?”